Guide

How to setup SSO with OneLogin

BlueTally lets you save time and headaches with our Single Sign-on integration with OneLogin that lets your team members log in and use the app without the need to manually create accounts and new passwords.
Log in to your OneLogin account
1
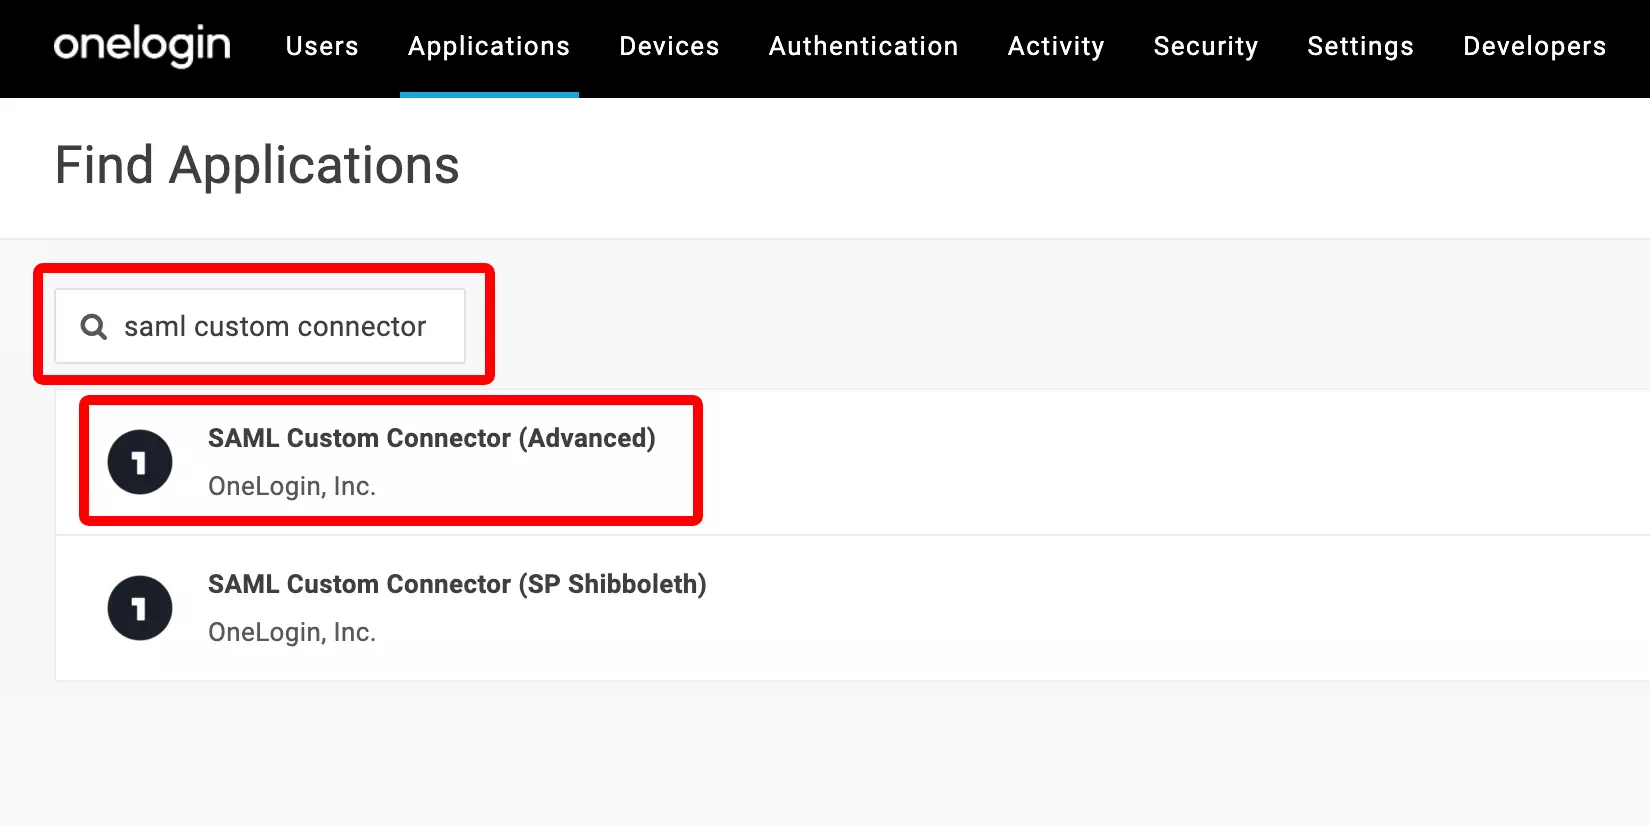
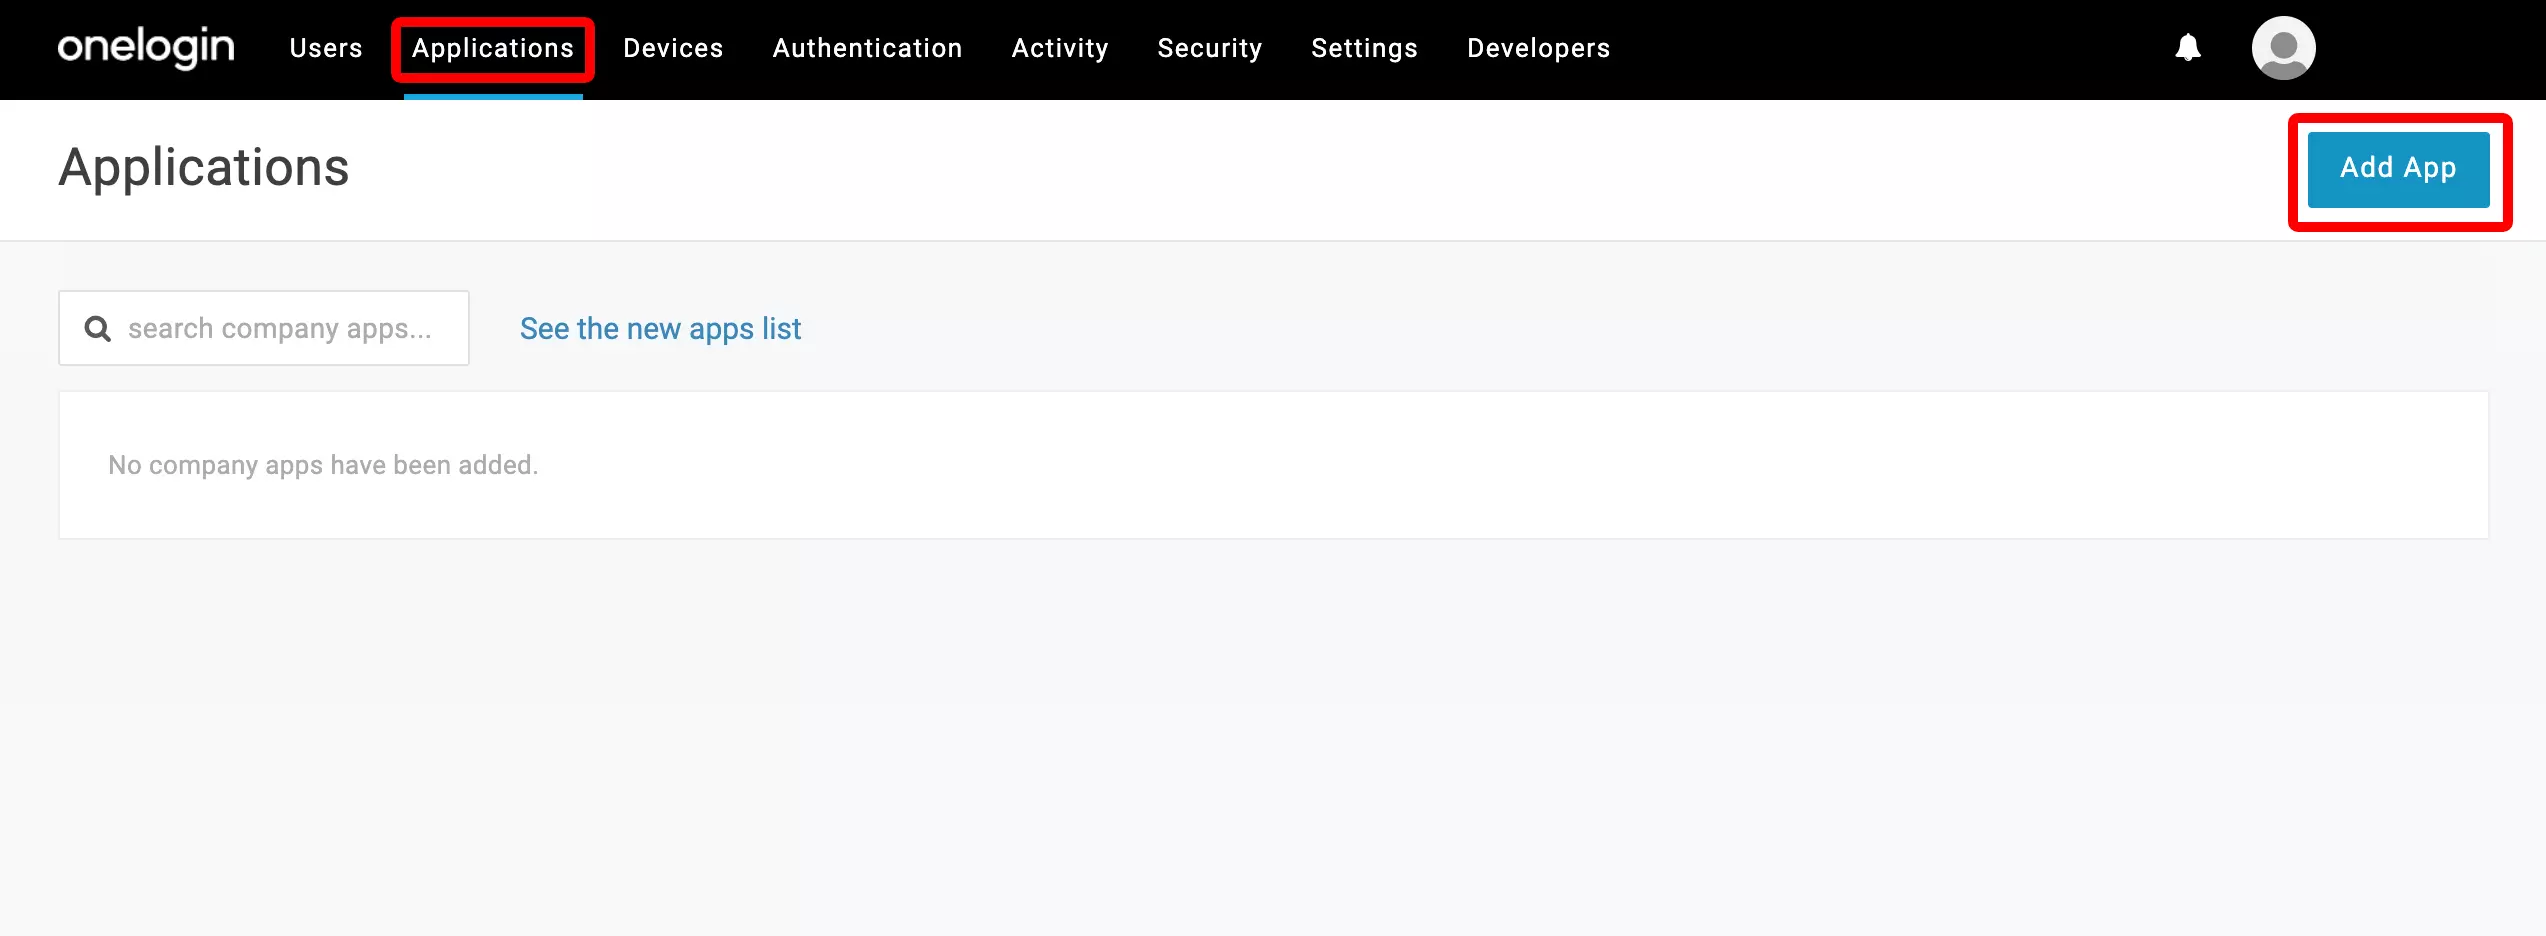
Click on "Applications", then on "Add App"
2
Search for "saml custom connector" and select "SAML Custom Connector (Advanced)"
3
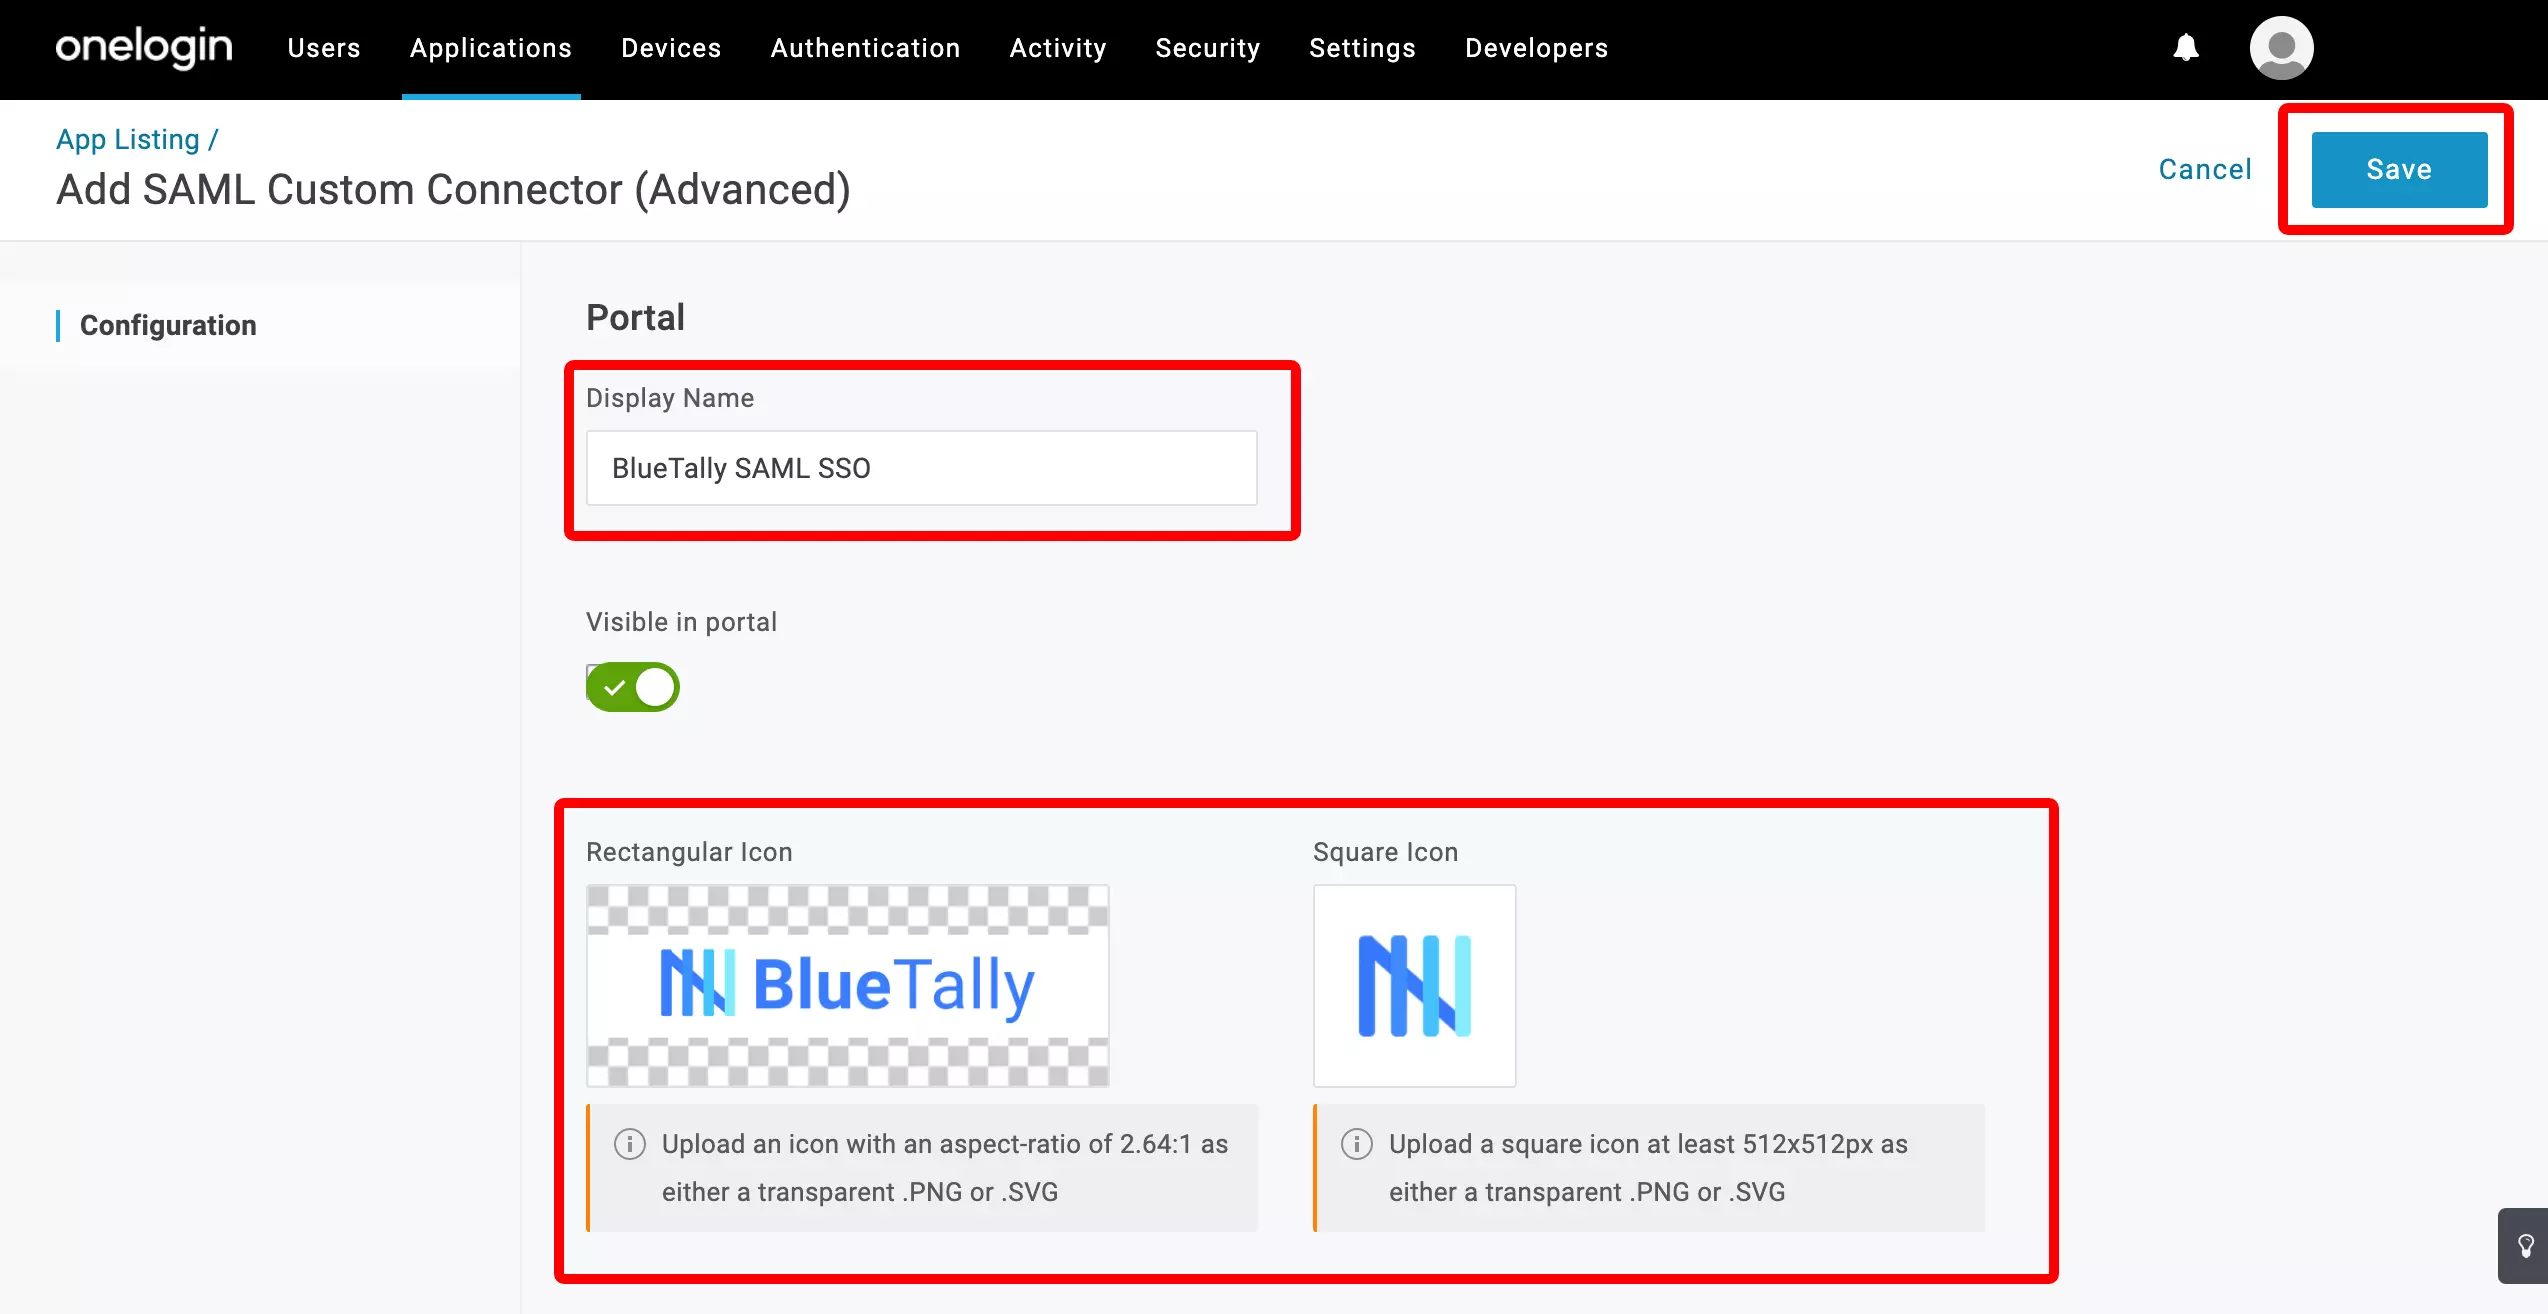
Give it a name (like BlueTally SAML SSO), upload icons (click here for the rectangular icon, click here for the square icon) and click "Save"
4
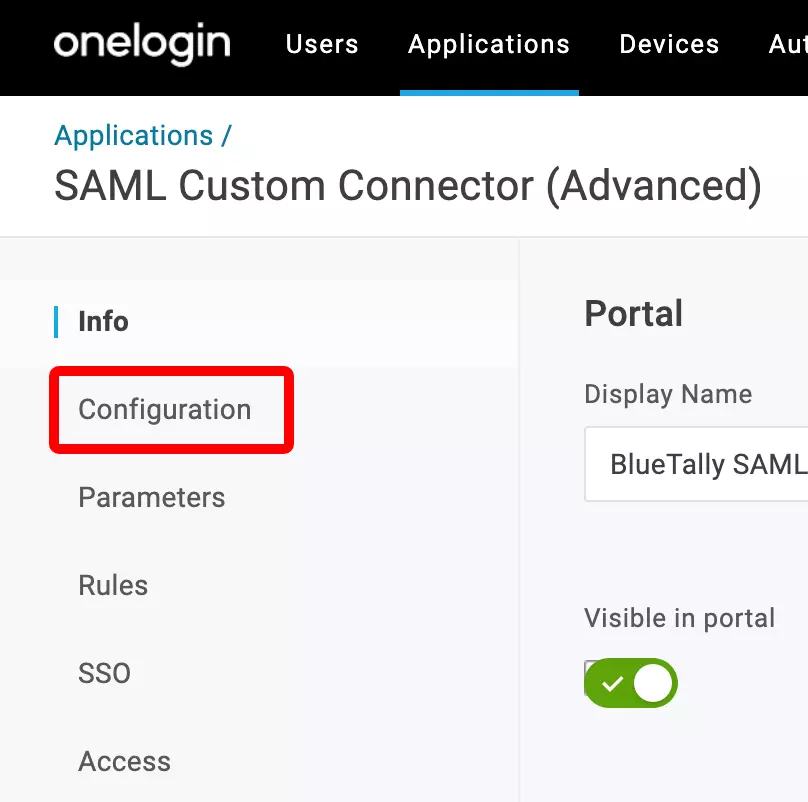
Click on "Configuration" in the left menu bar
5
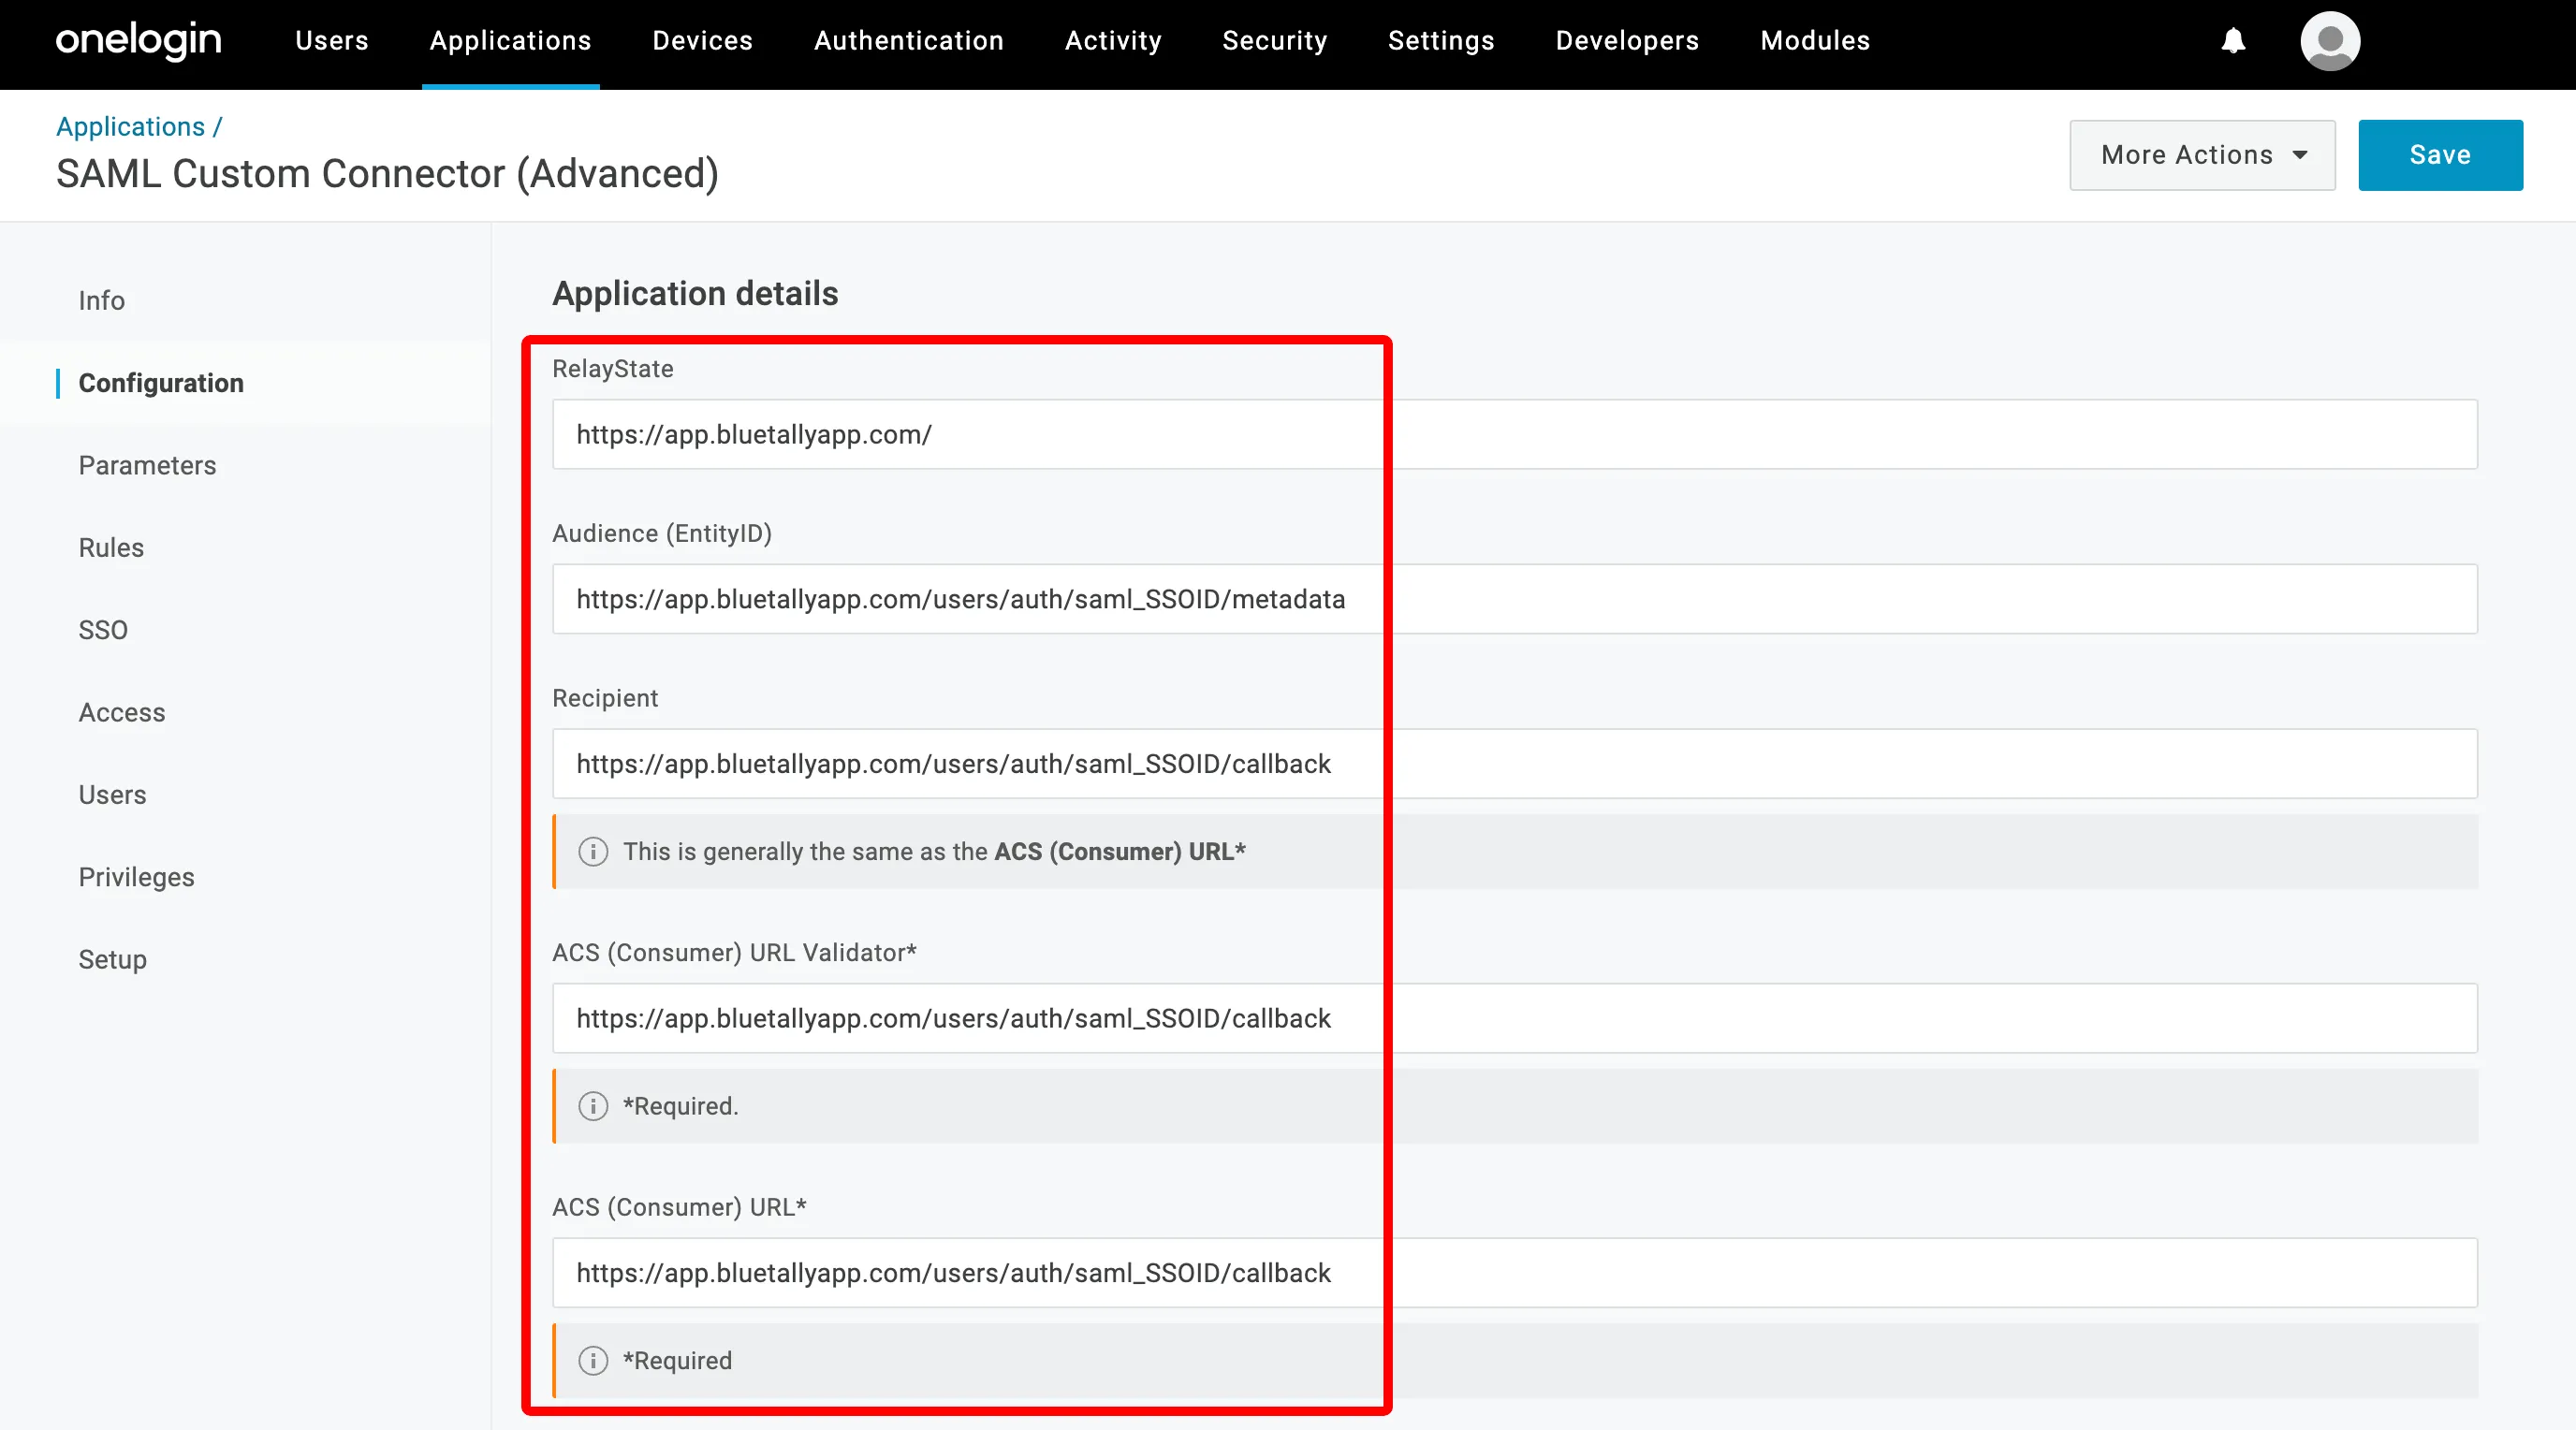
Enter "https://app.bluetallyapp.com/" in the RelayState field,
"https://app.bluetallyapp.com/users/auth/saml_SSOID/metadata" in the Audience (EntityID) field,
"https://app.bluetallyapp.com/users/auth/saml_SSOID/callback" in the Recipient field,
"https://app.bluetallyapp.com/users/auth/saml_SSOID/callback" in the ACS (Consumer) URL Validator field,
"https://app.bluetallyapp.com/users/auth/saml_SSOID/callback" in the ACS (Consumer) URL field and scroll down

(replace SSOID with the SSO ID from your BlueTally account settings)
6
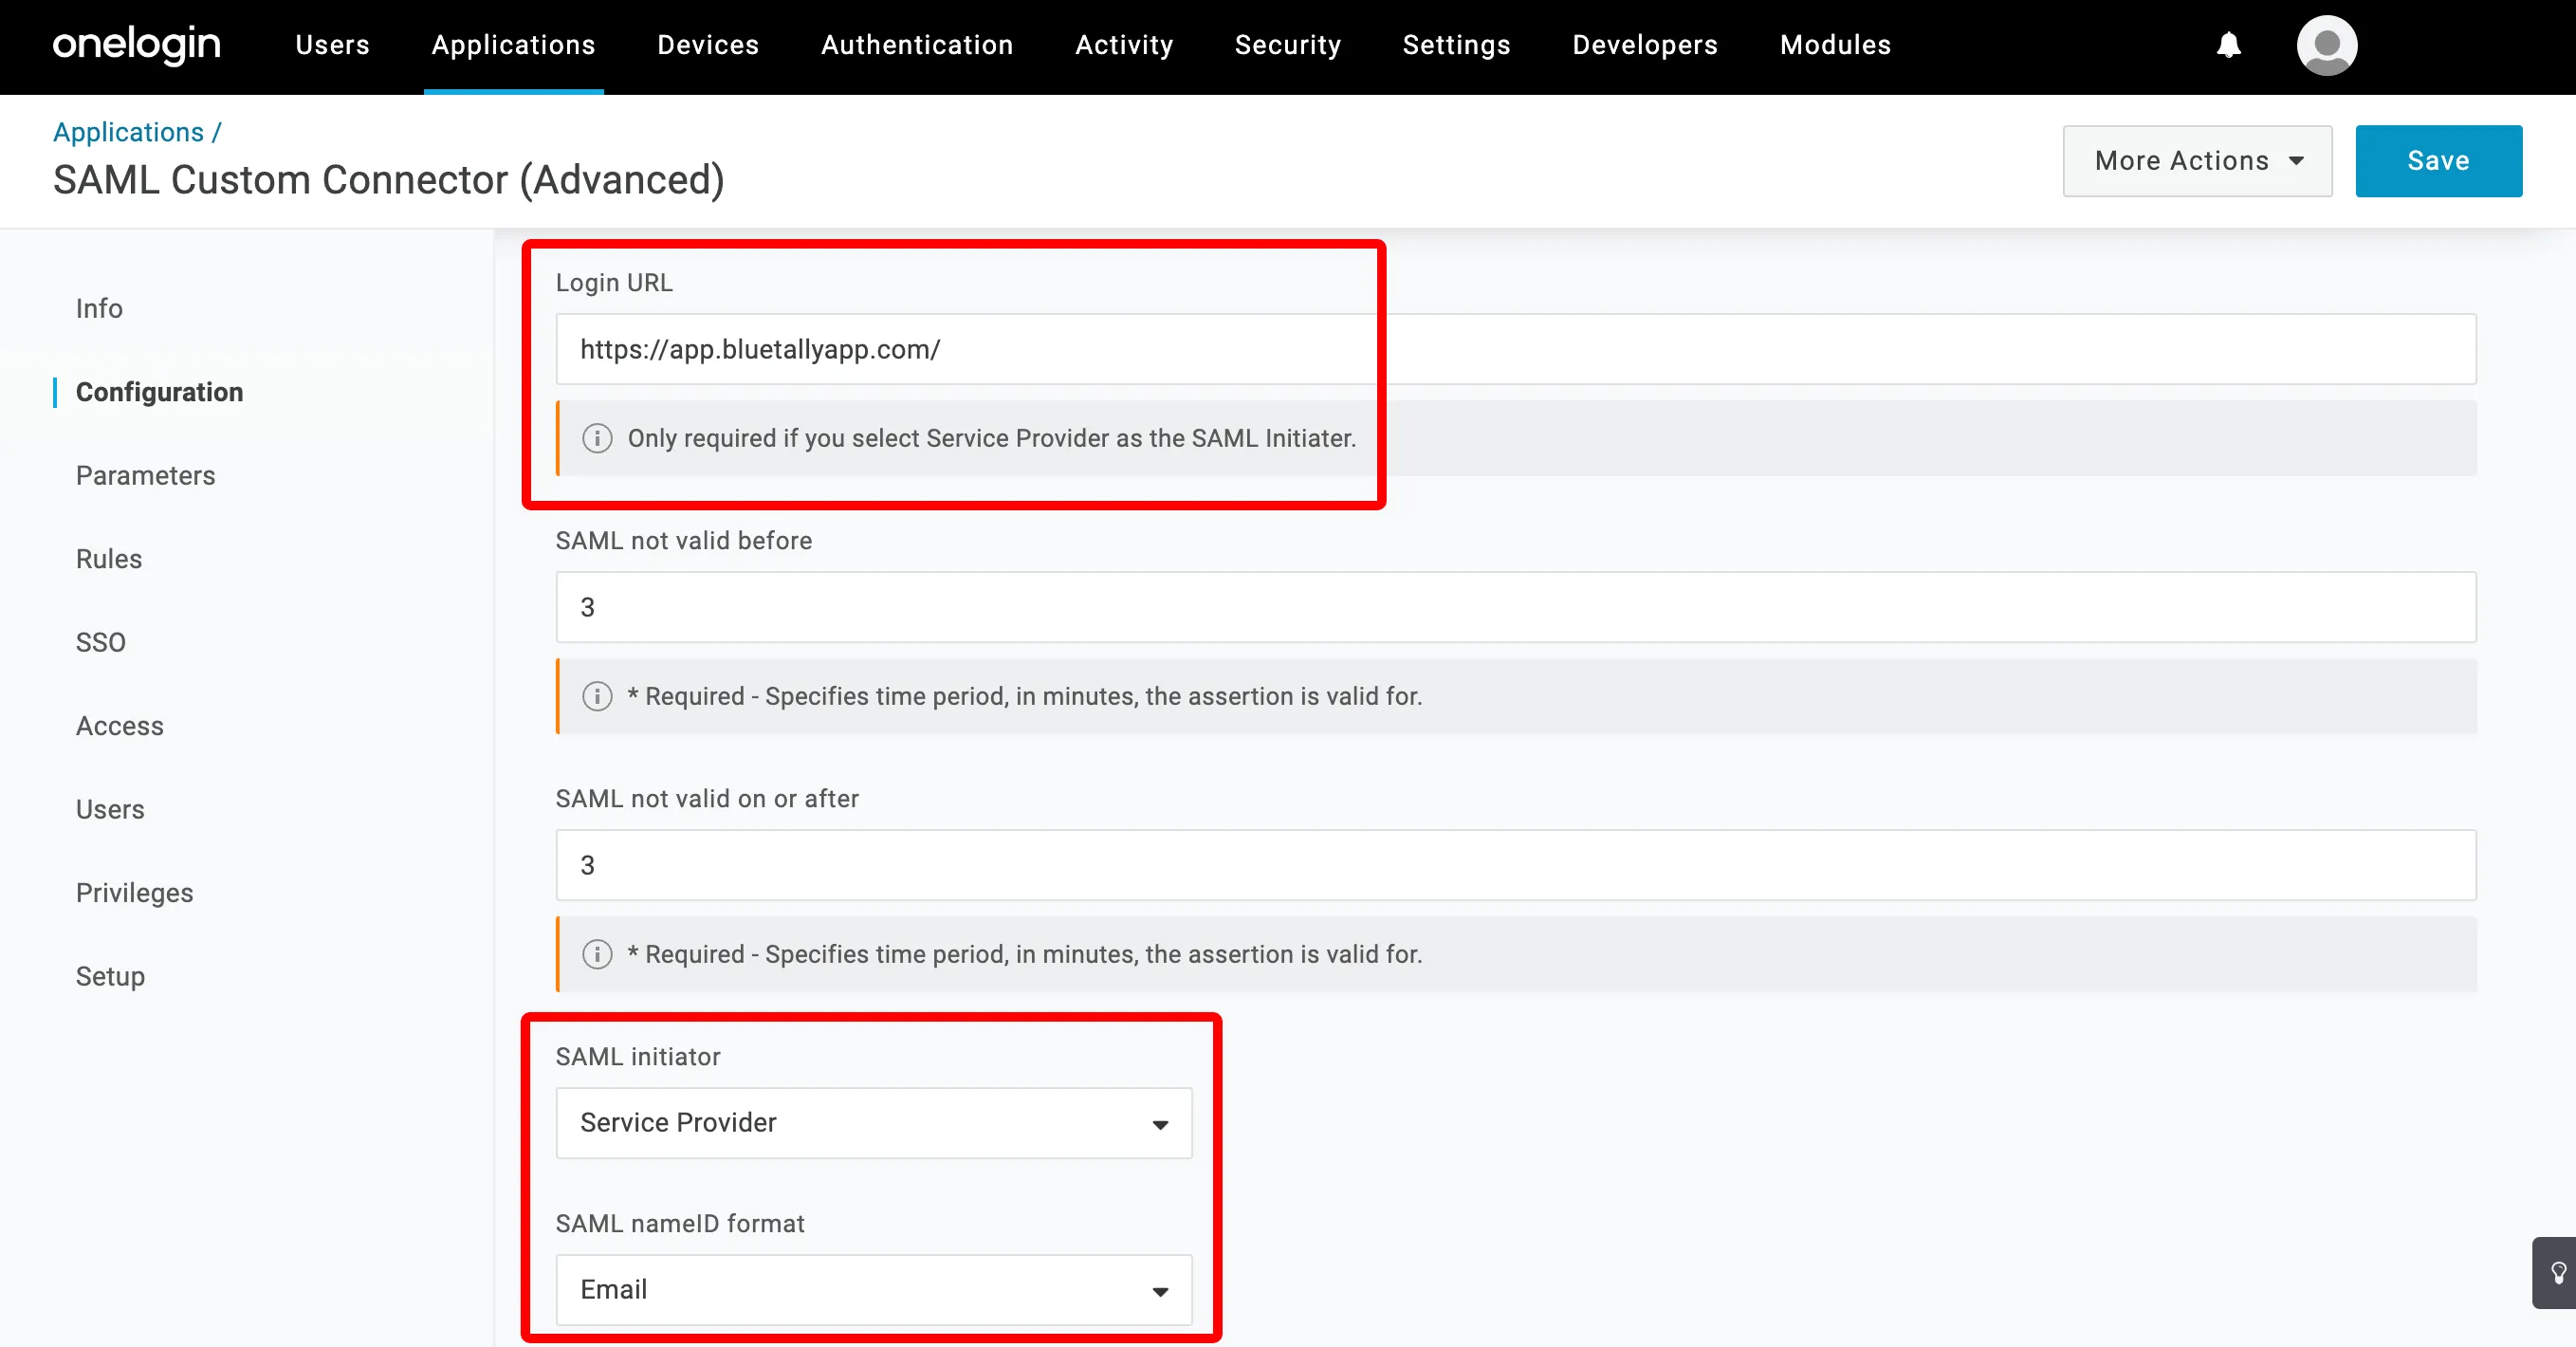
Enter "https://app.bluetallyapp.com/" in the Login URL field, change the SAML Initiator to "Service Provider", ensure the SAML nameID format is "Email" and click "Save"
7
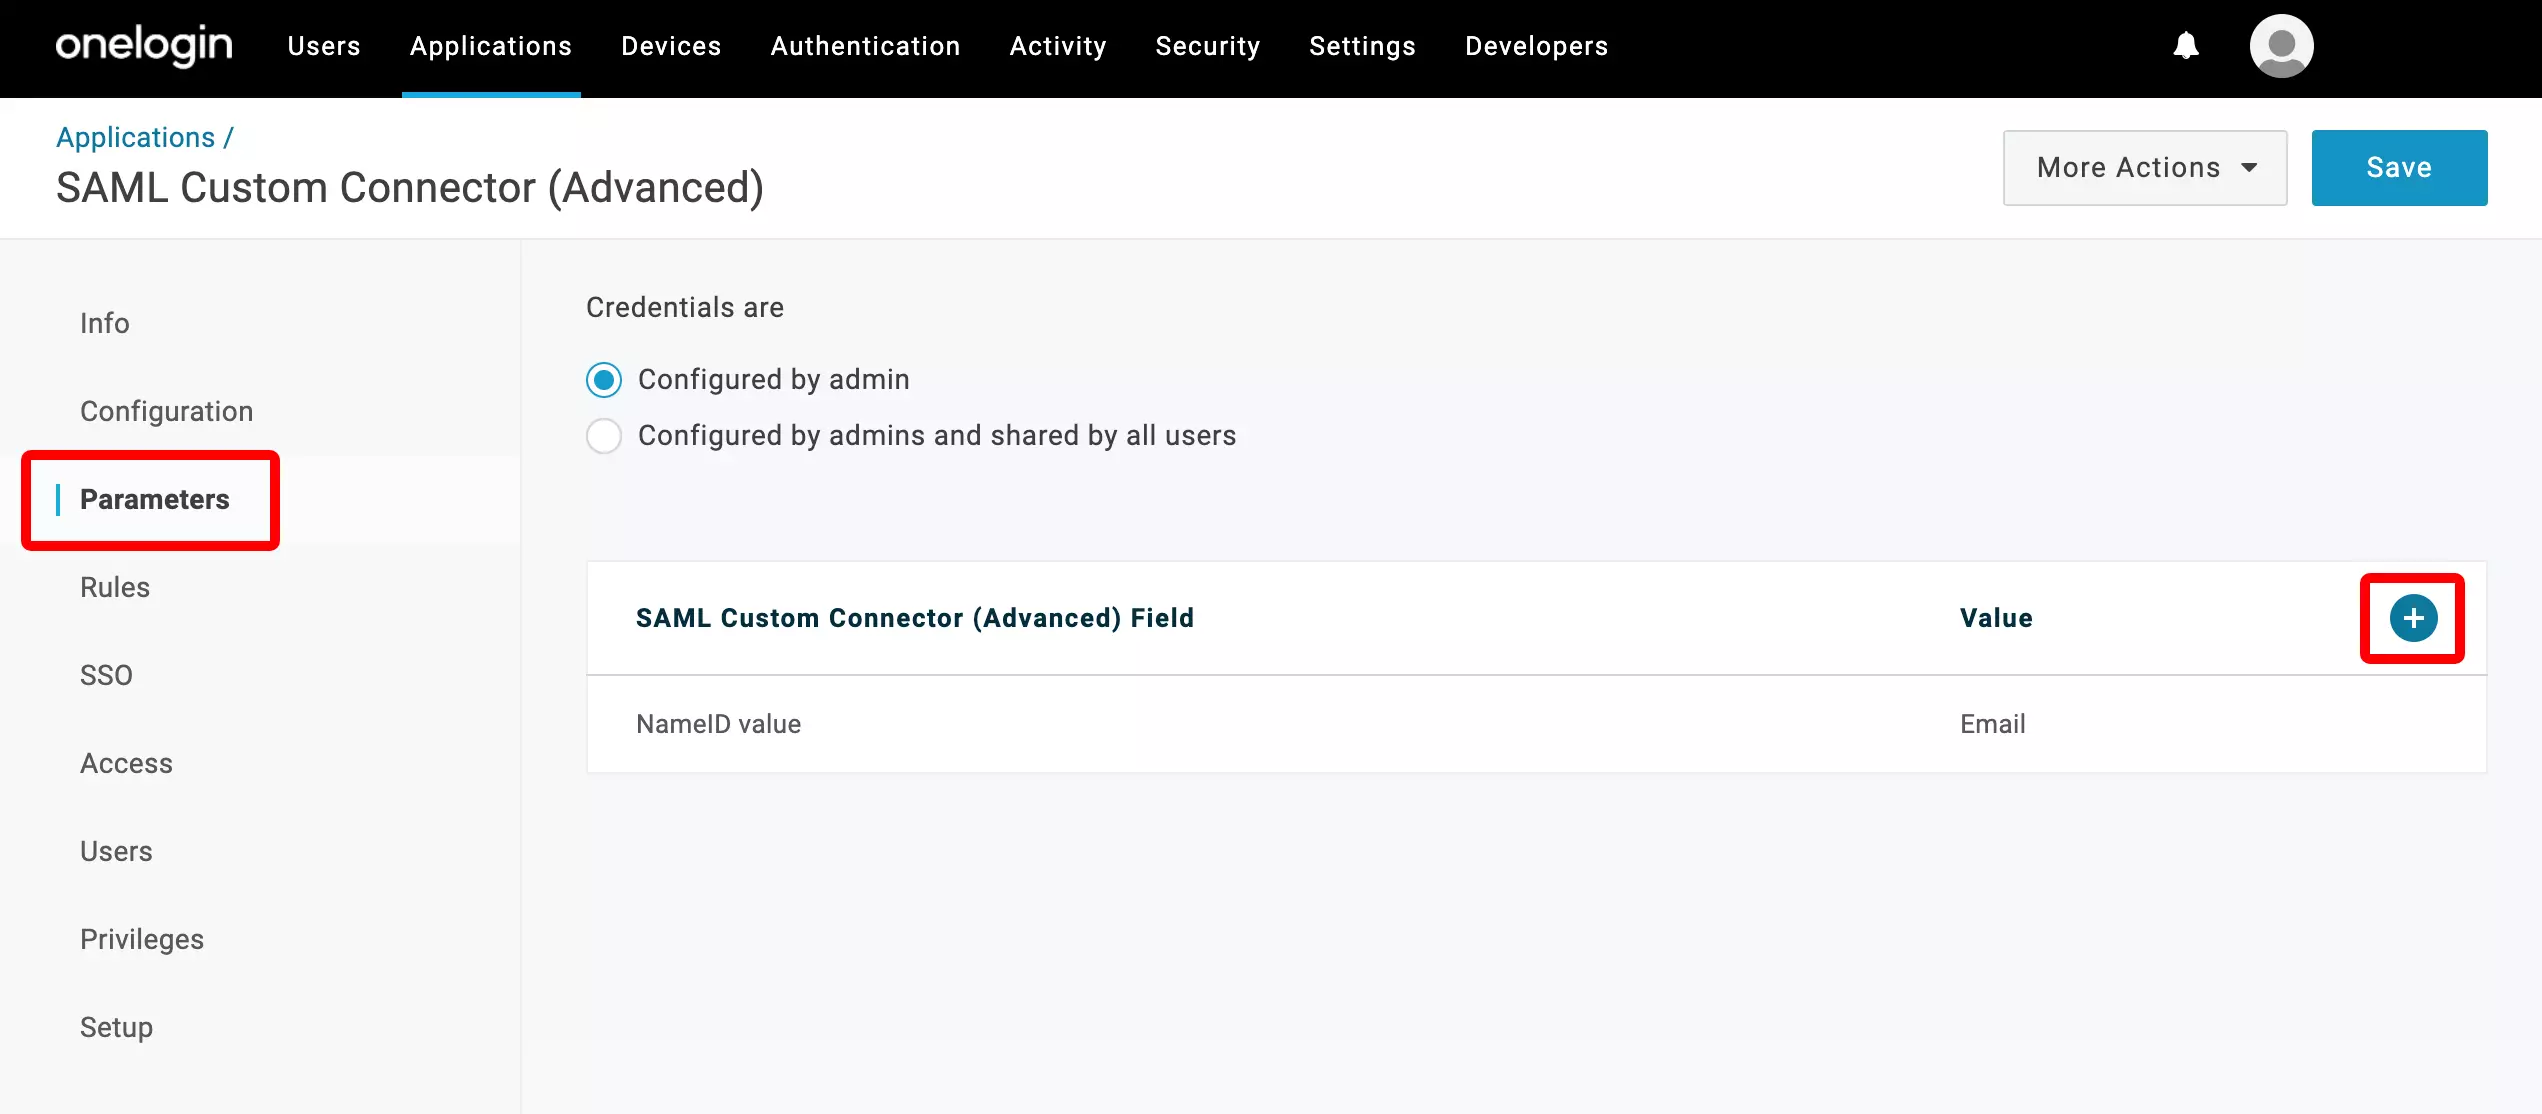
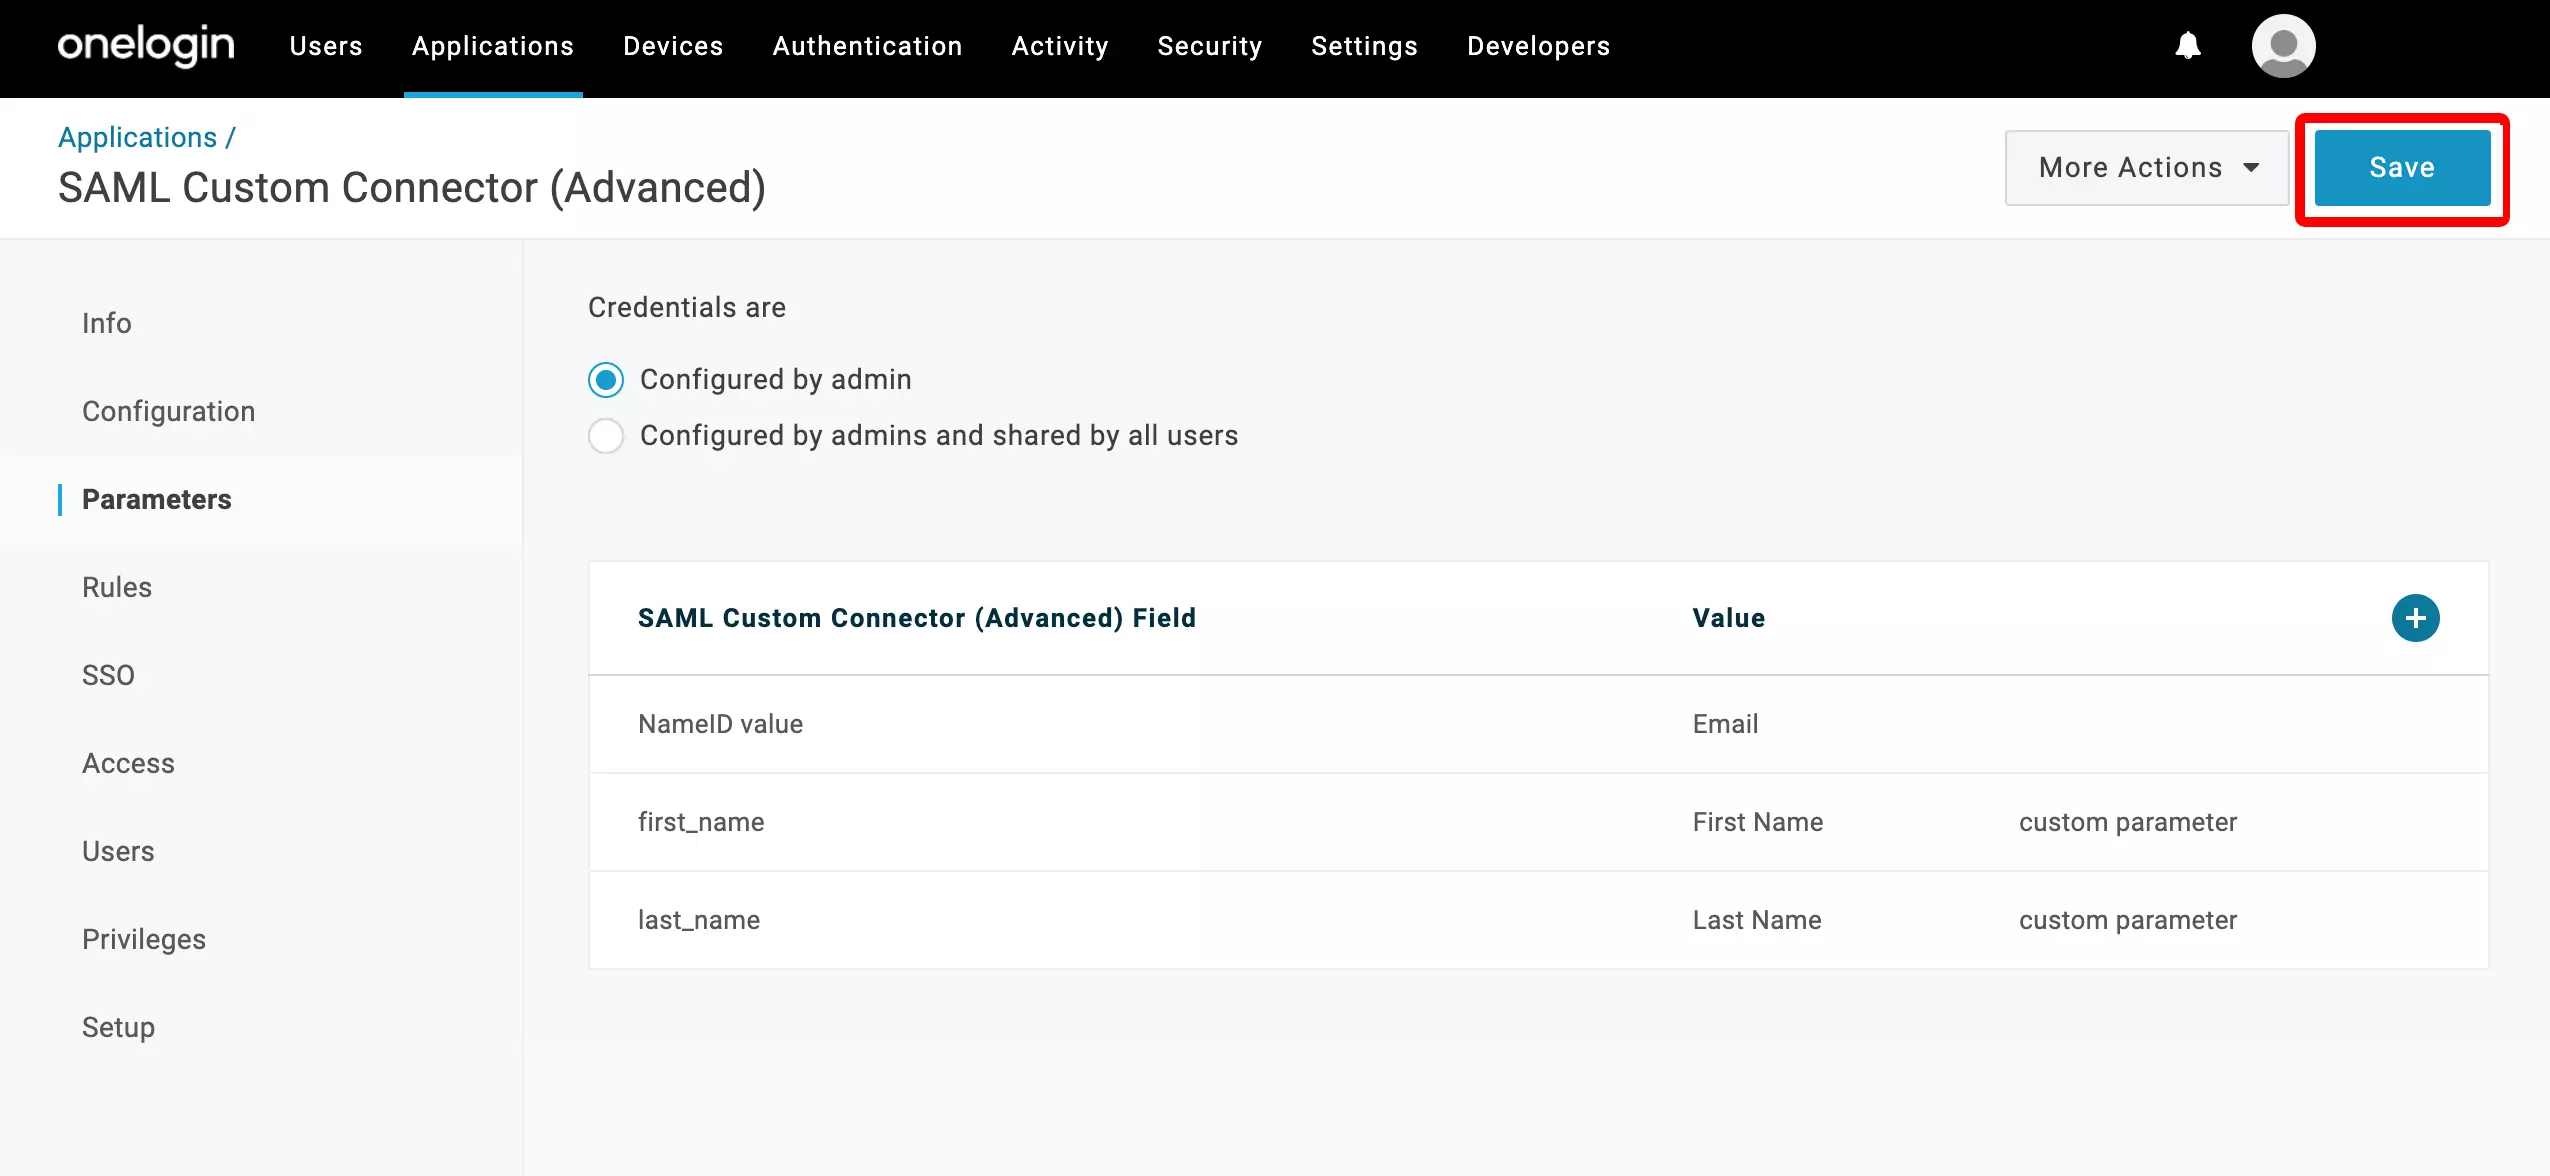
Click on "Parameters" in the left menu bar, and click on "+" to add a new field
8
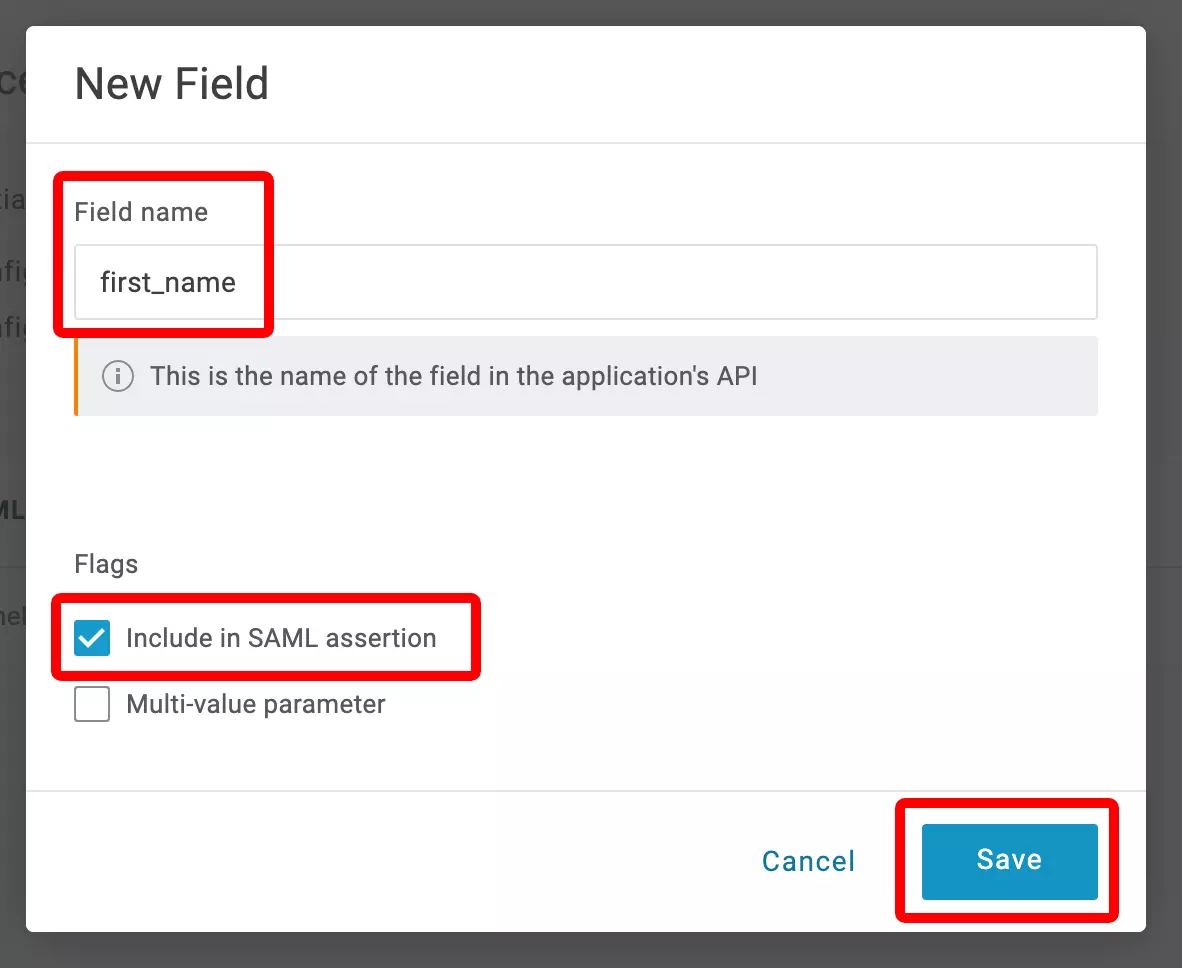
Enter "first_name" as the Field Name, tick the "Include in SAML assertion" checkbox and click "Save"
9
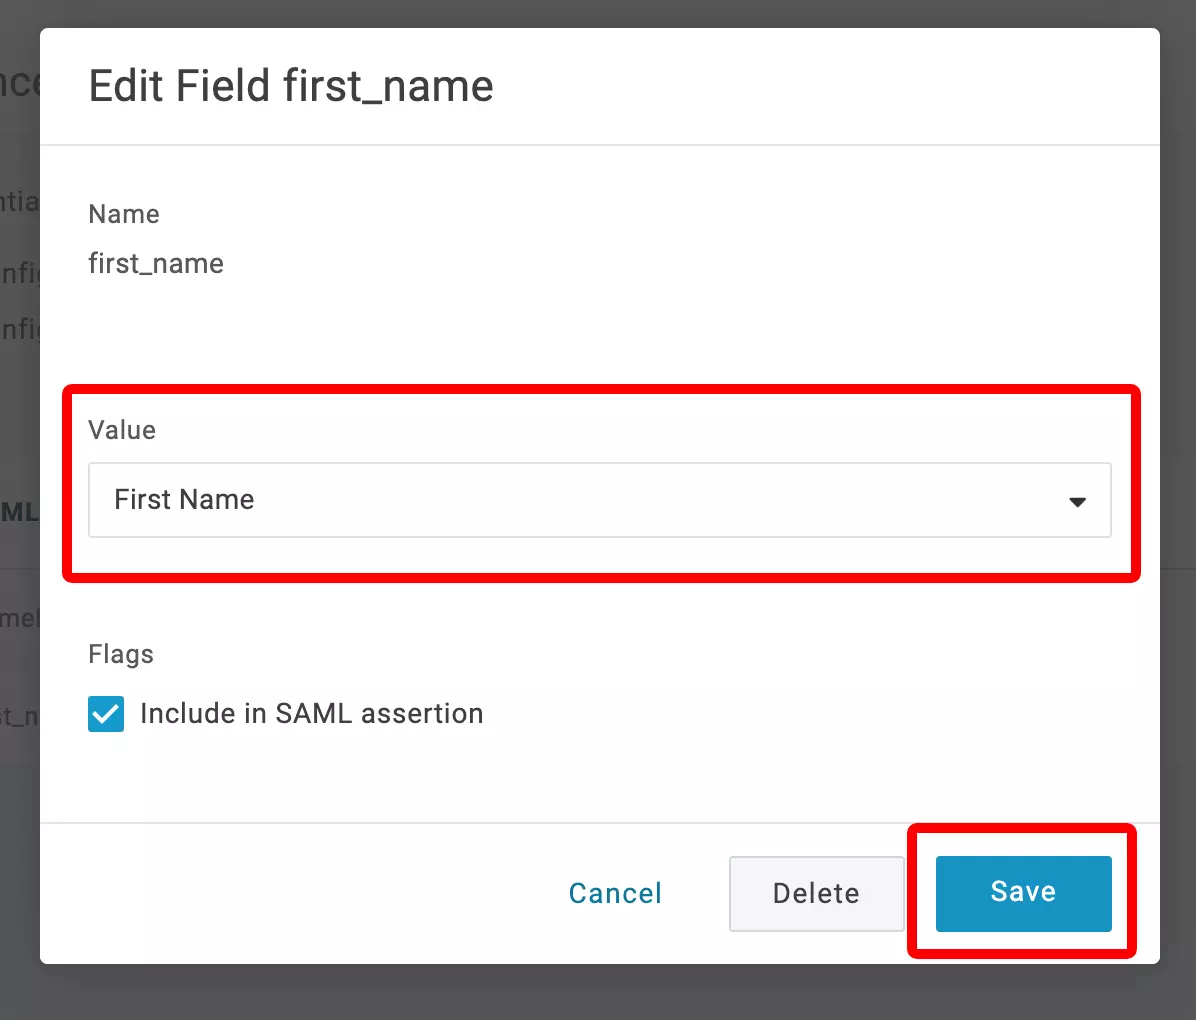
Select "First Name" from the list of values and click "Save"
10
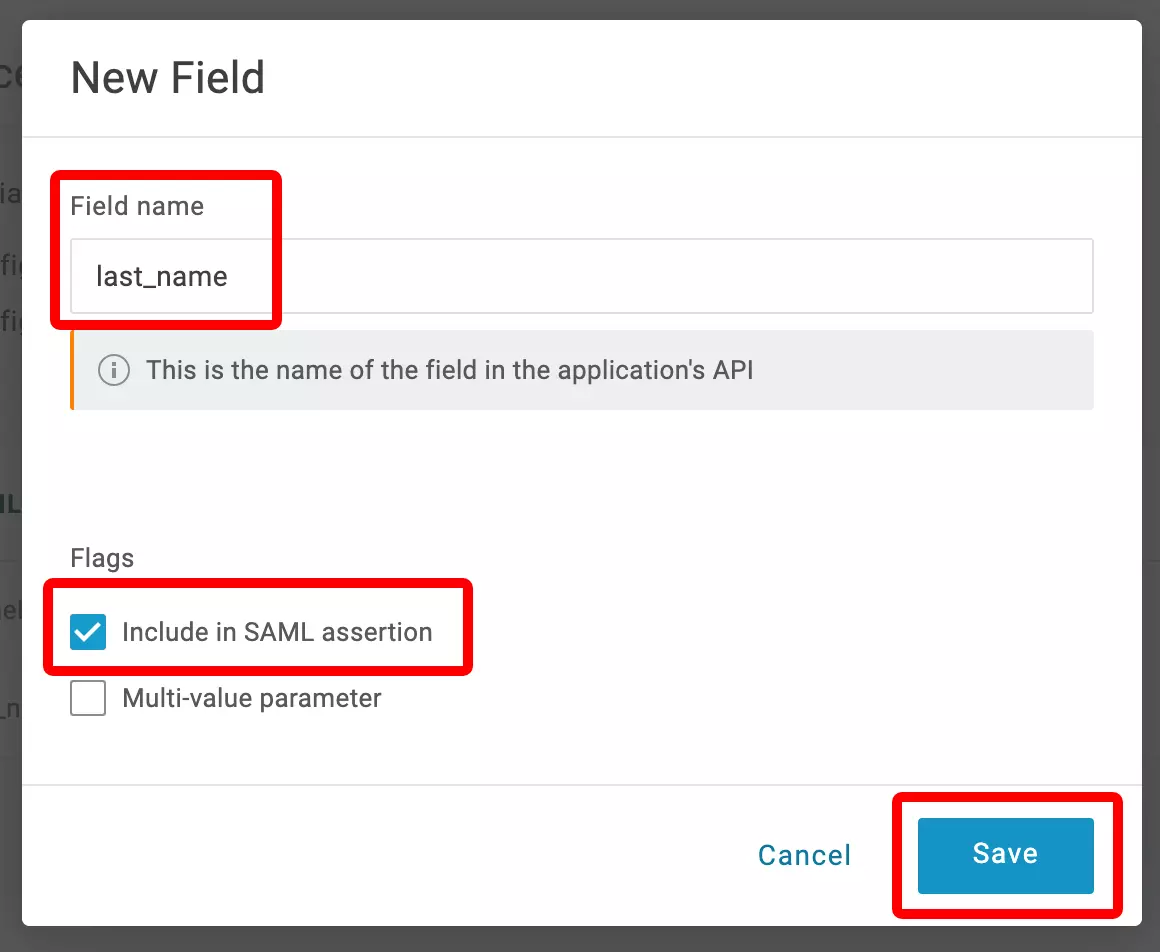
Enter "last_name" as the Field Name, tick the "Include in SAML assertion" checkbox and click "Save"
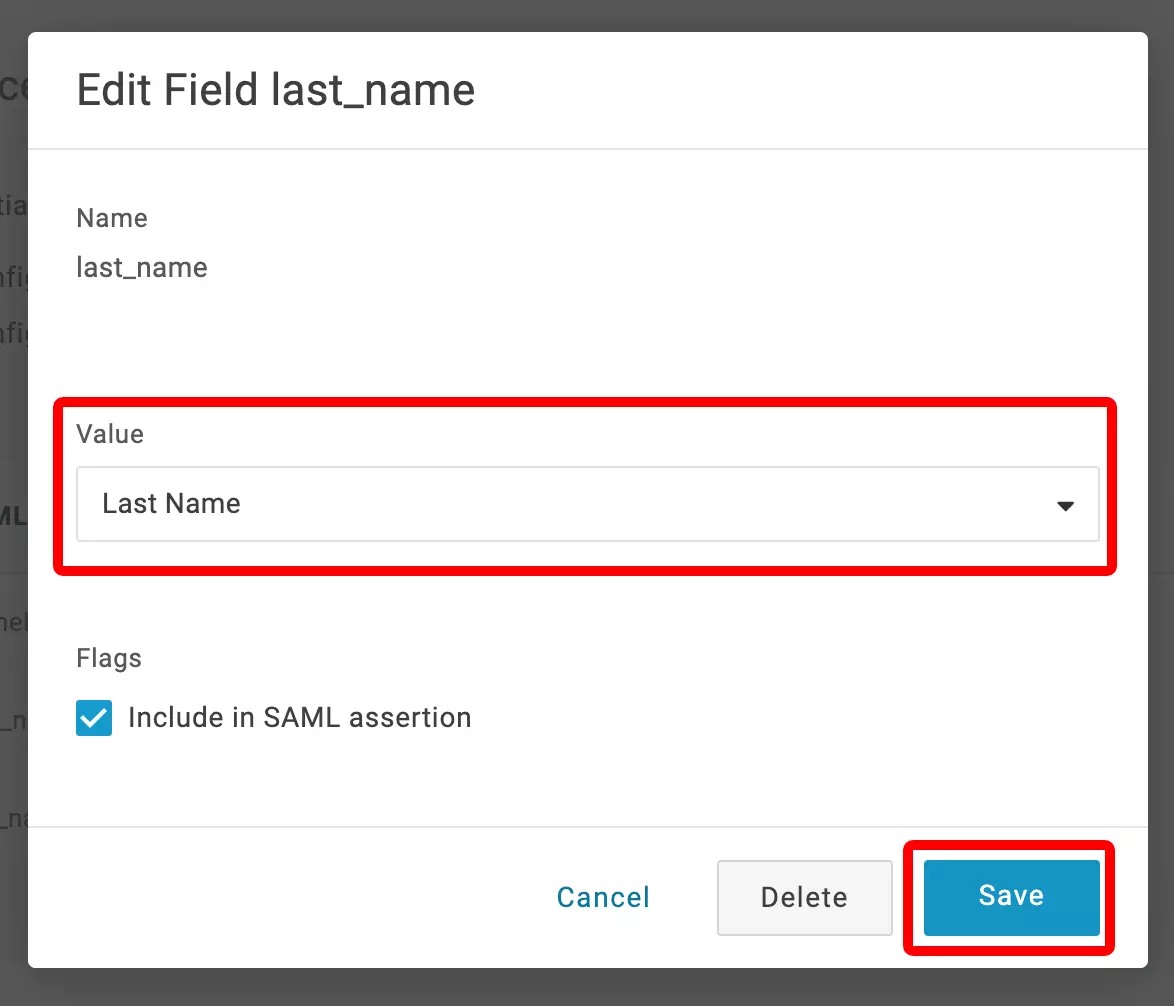
11
Select "Last Name" from the list of values and click "Save"
12
Click on "Save"
13
Click on "SSO" in the left menu bar, then copy the "SAML 2.0 Endpoint (HTTP)" and note it down for later, and click on "View Details" under X.509 Certificate
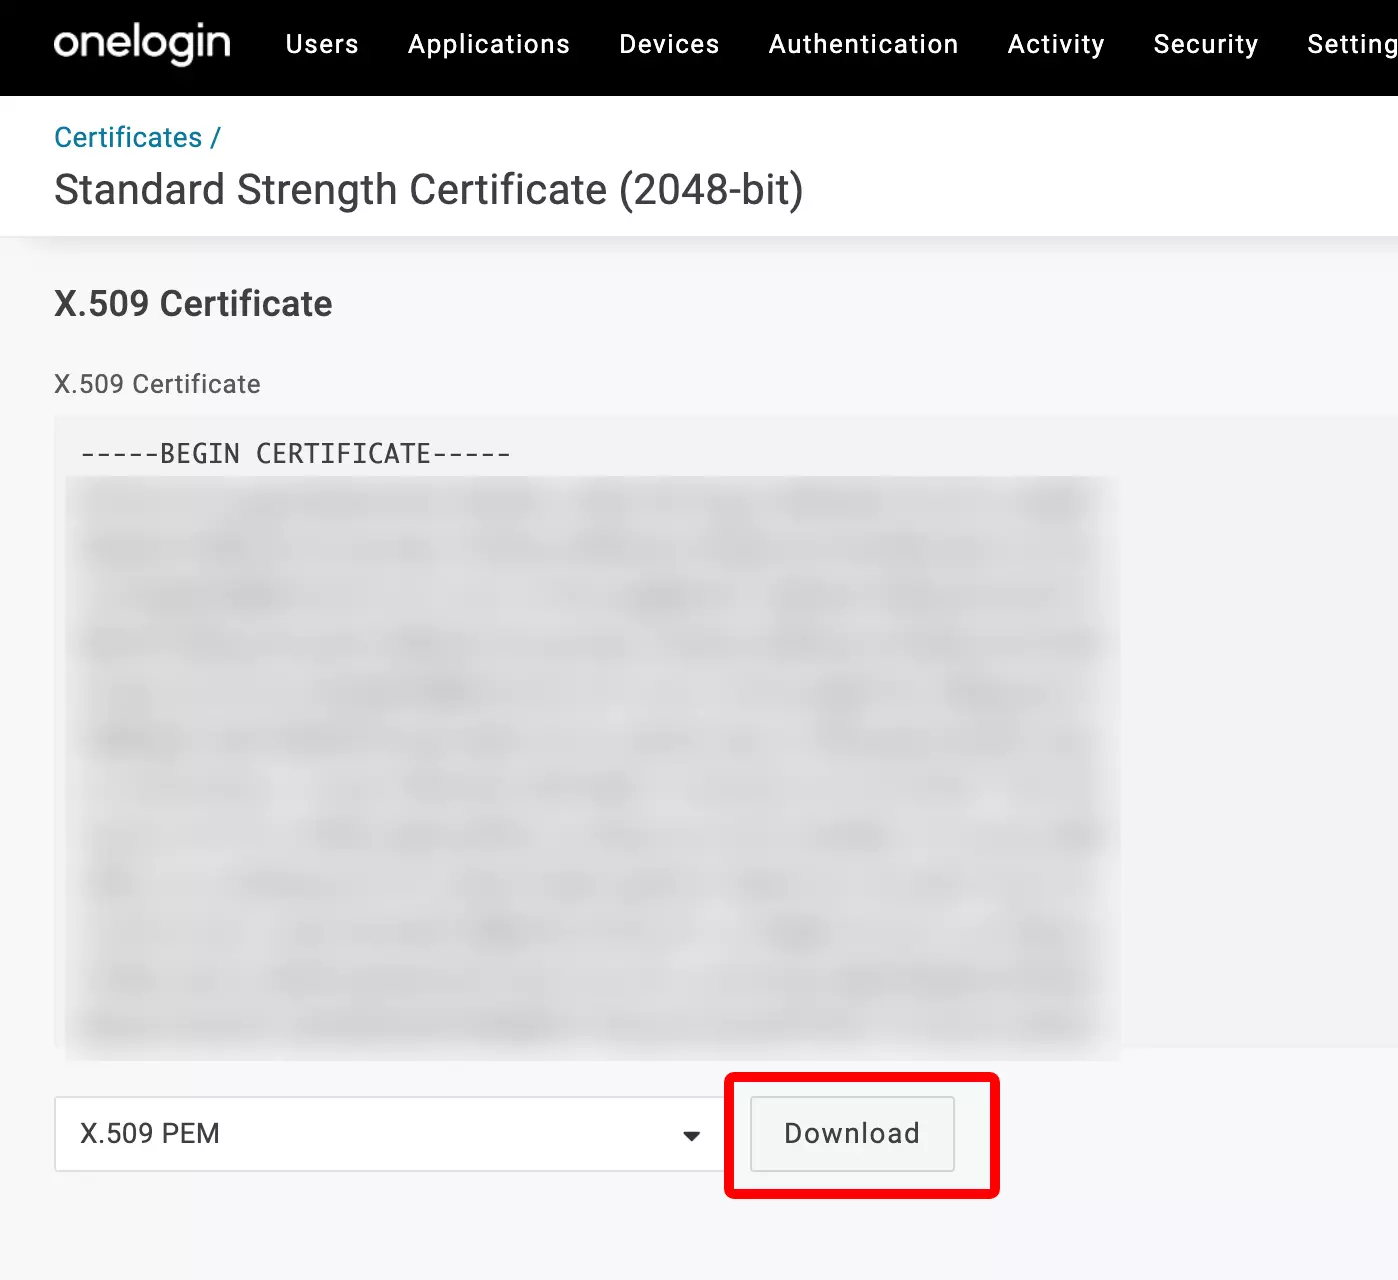
14
Scroll down and download the certificate
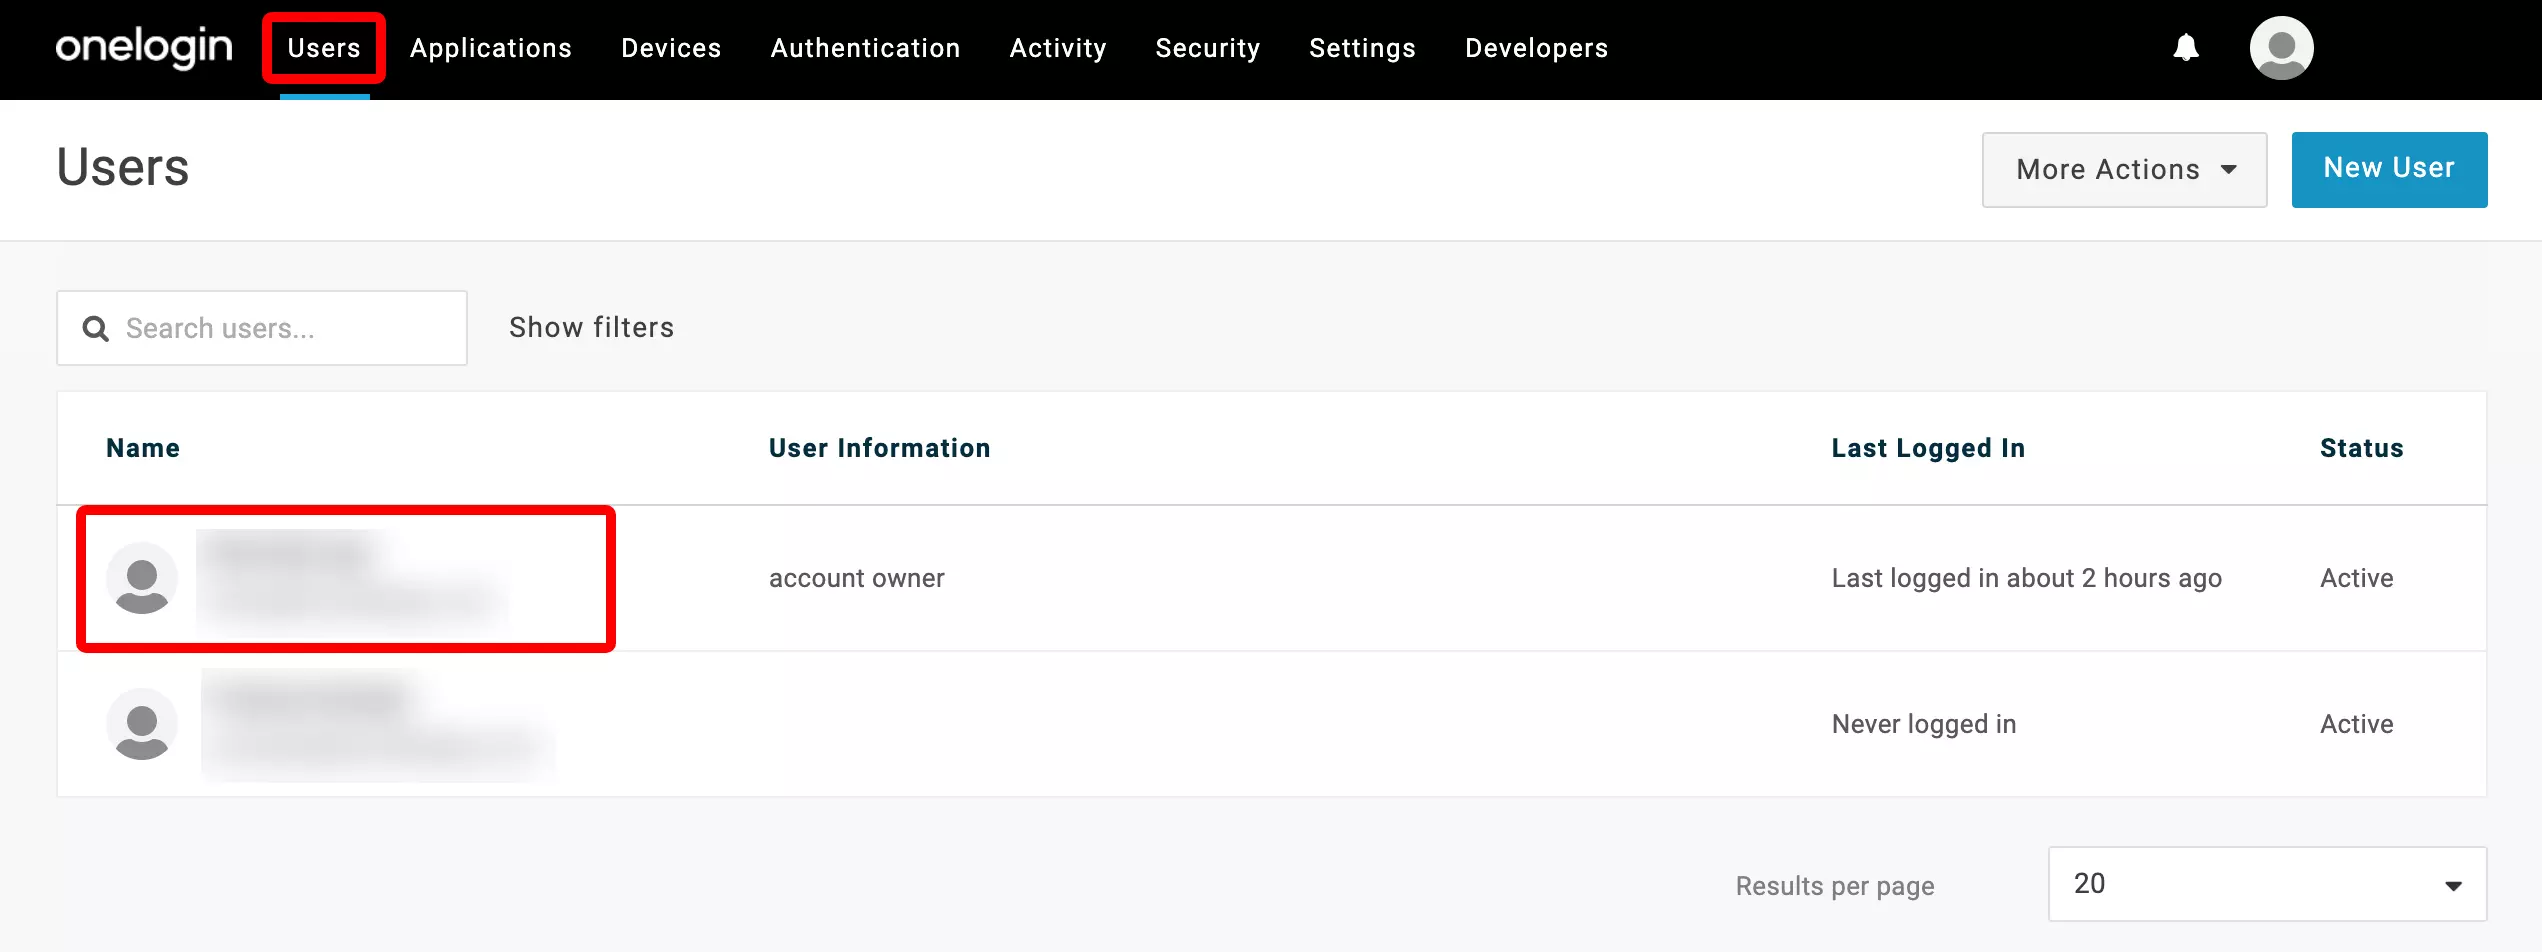
15
Click on Users and select a user you'd like to be able to sign into BlueTally using SSO
16
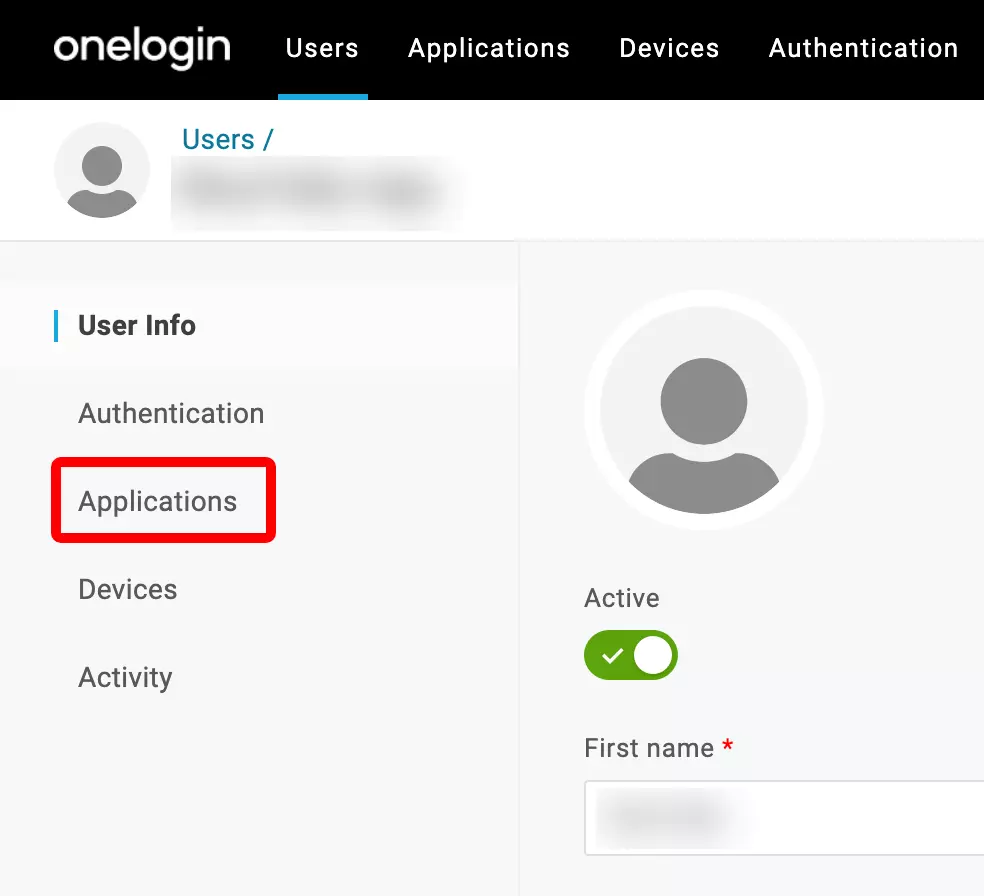
Click on "Applications" in the left menu bar
17
Click on "+" to add a new application for the user
18
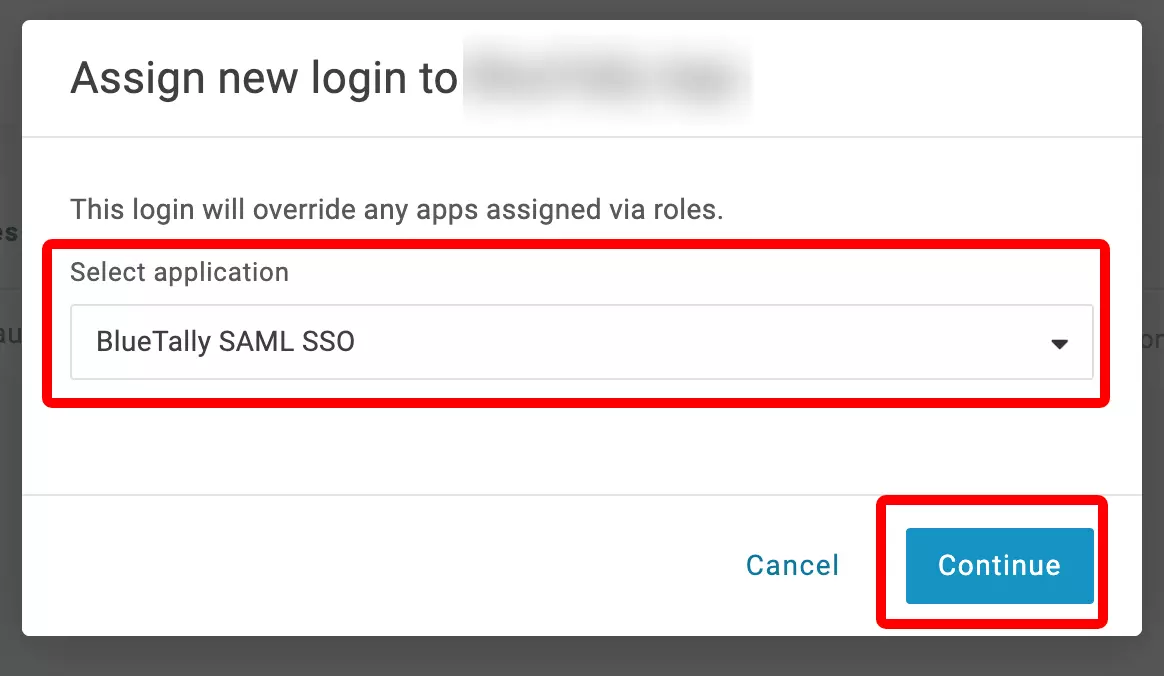
Select the app you just made (BlueTally SAML SSO) and click "Continue"
19
Make sure "Allow the user to sign in" is checked and click on "Save". Repeat this process (Step 15-19) for all the groups or users you'd like to have SSO login
20
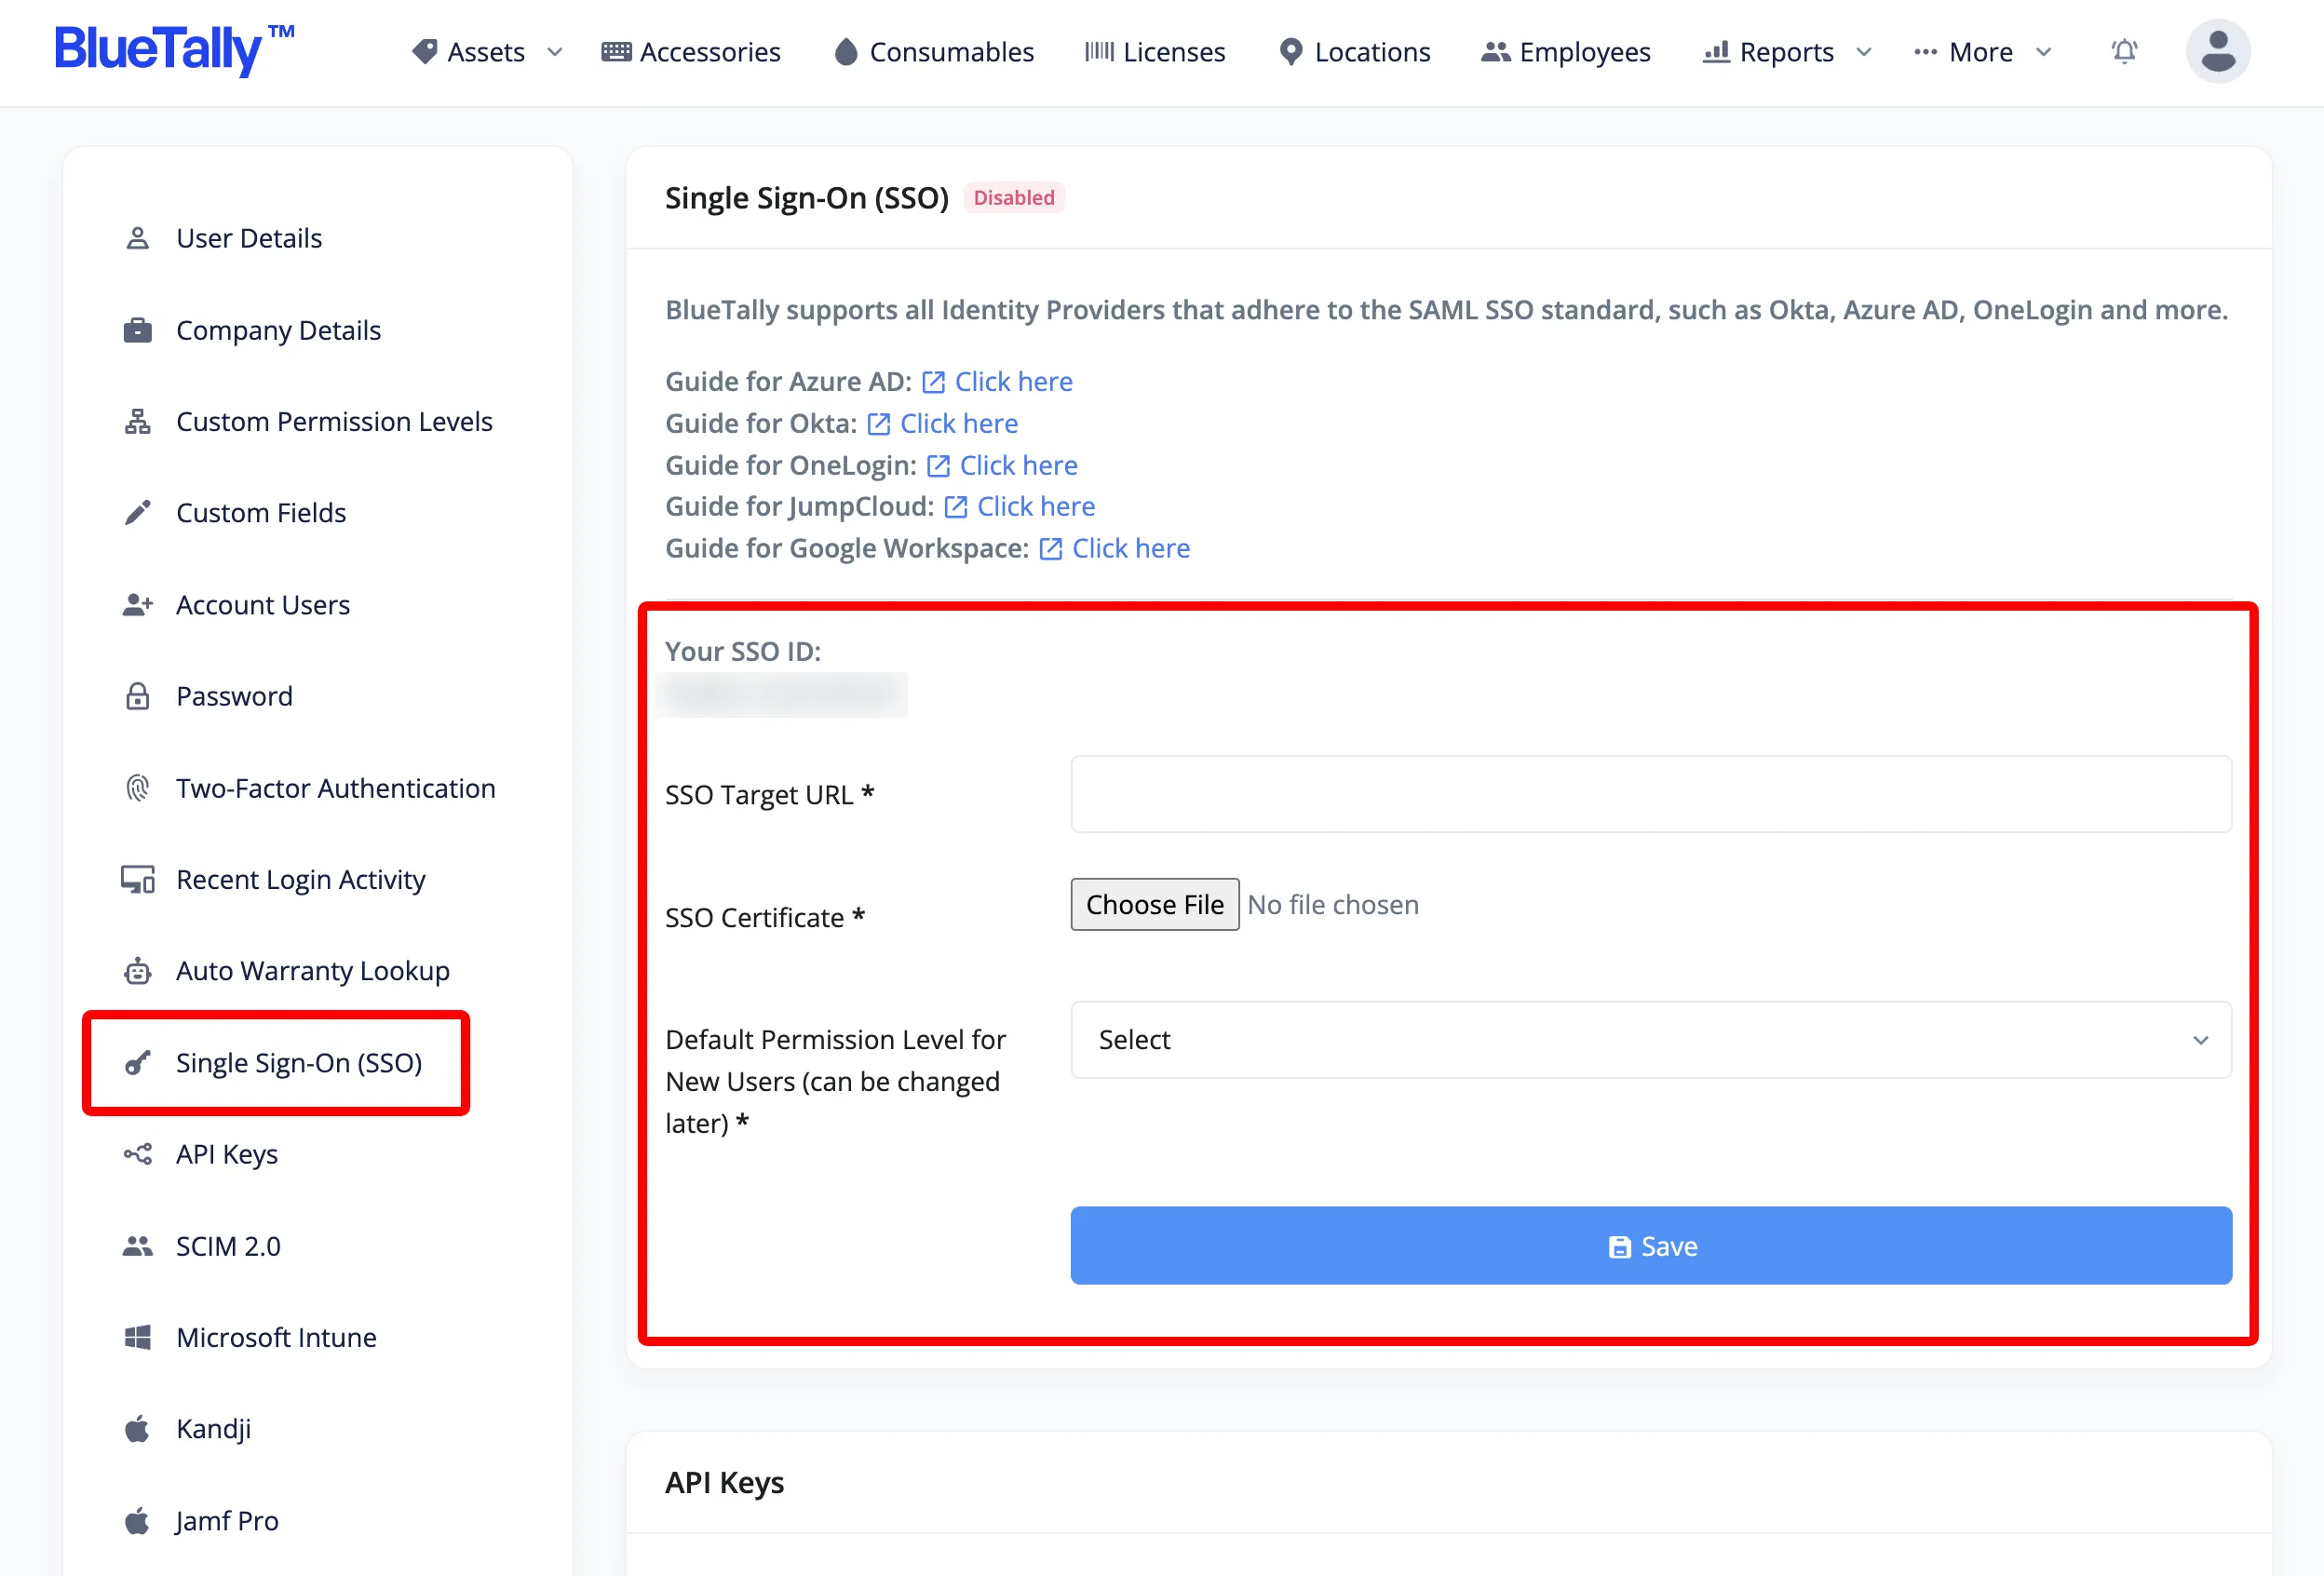
Go to your BlueTally account settings and paste in the "SAML 2.0 Endpoint (HTTP)", upload the certificate and decide on which role you'd like new users to have by default.

That's it! Once you upload these details into your account settings, we'll complete the setup on our end - this can take up to 24 hours. You'll receive an email when everything is ready.

Once SSO has been setup on your account, giving new users access to BlueTally will be done in the OneLogin application you just created. The same goes for removing user access. New users will only appear in the Account User list in BlueTally after they've signed in for the first time.

If you have any questions regarding this integration, send us an email to support@bluetallyapp.com and we'll assist you with your setup!

You can also receive notifications directly to Microsoft Teams and Slack, integrate BlueTally with Intune, or into your existing workflows by using our powerful API.