Guide

How to setup SSO with Azure Active Directory


BlueTally lets you save time and headaches with our Single Sign-on integration with Azure Active Directory, that lets your team members log in and use the app without the need to manually create accounts and new passwords.

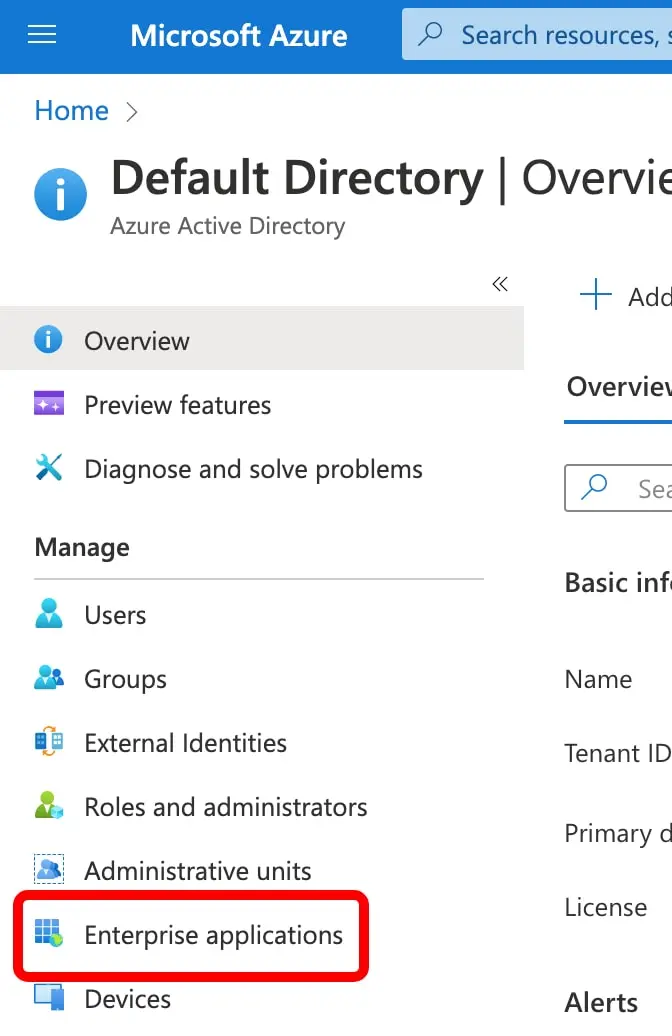
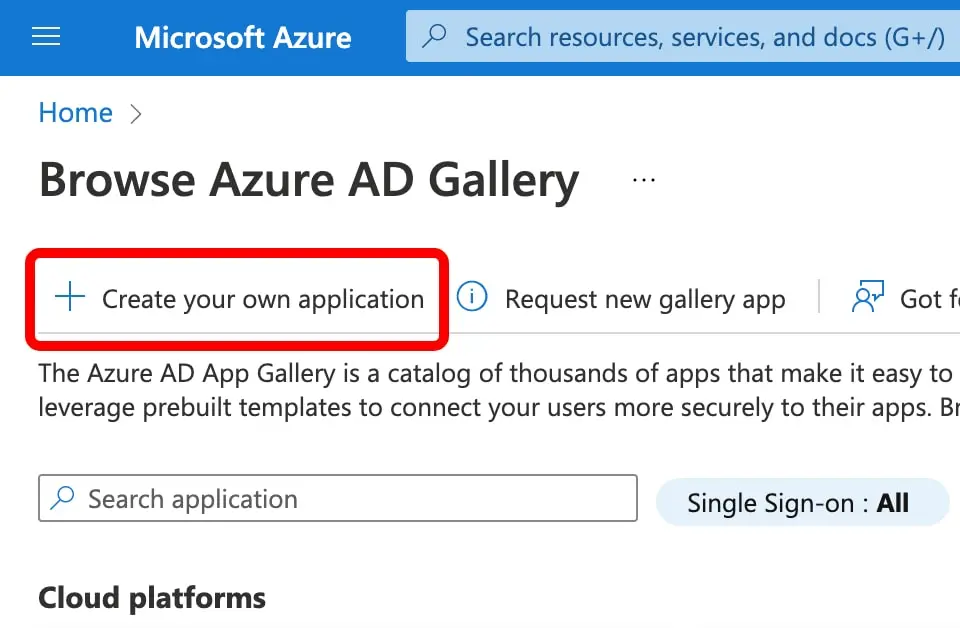
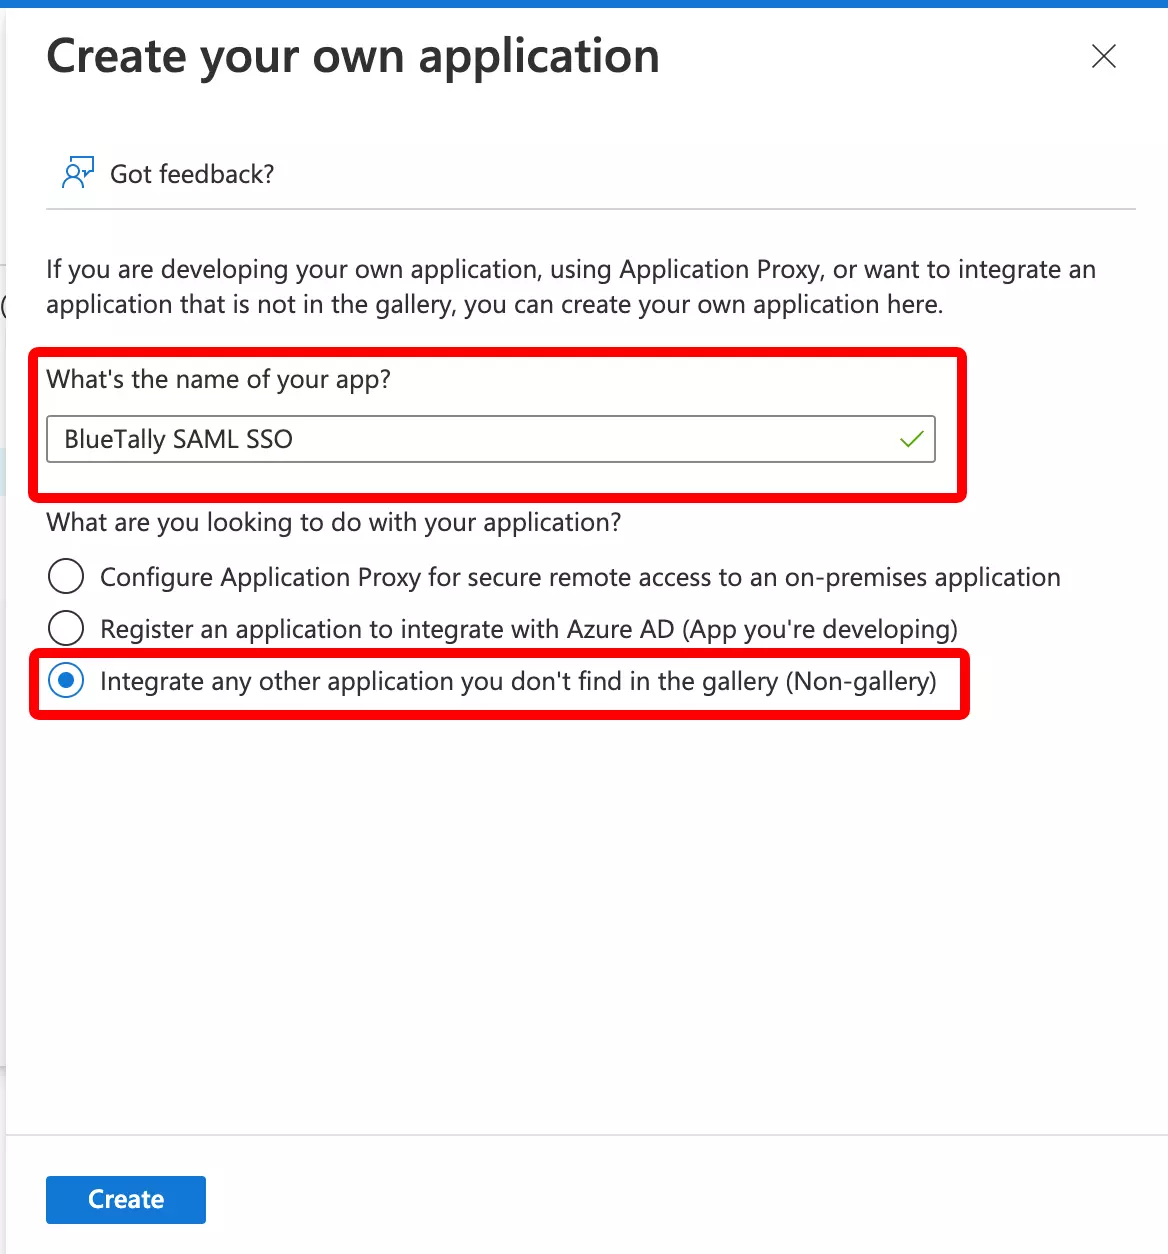
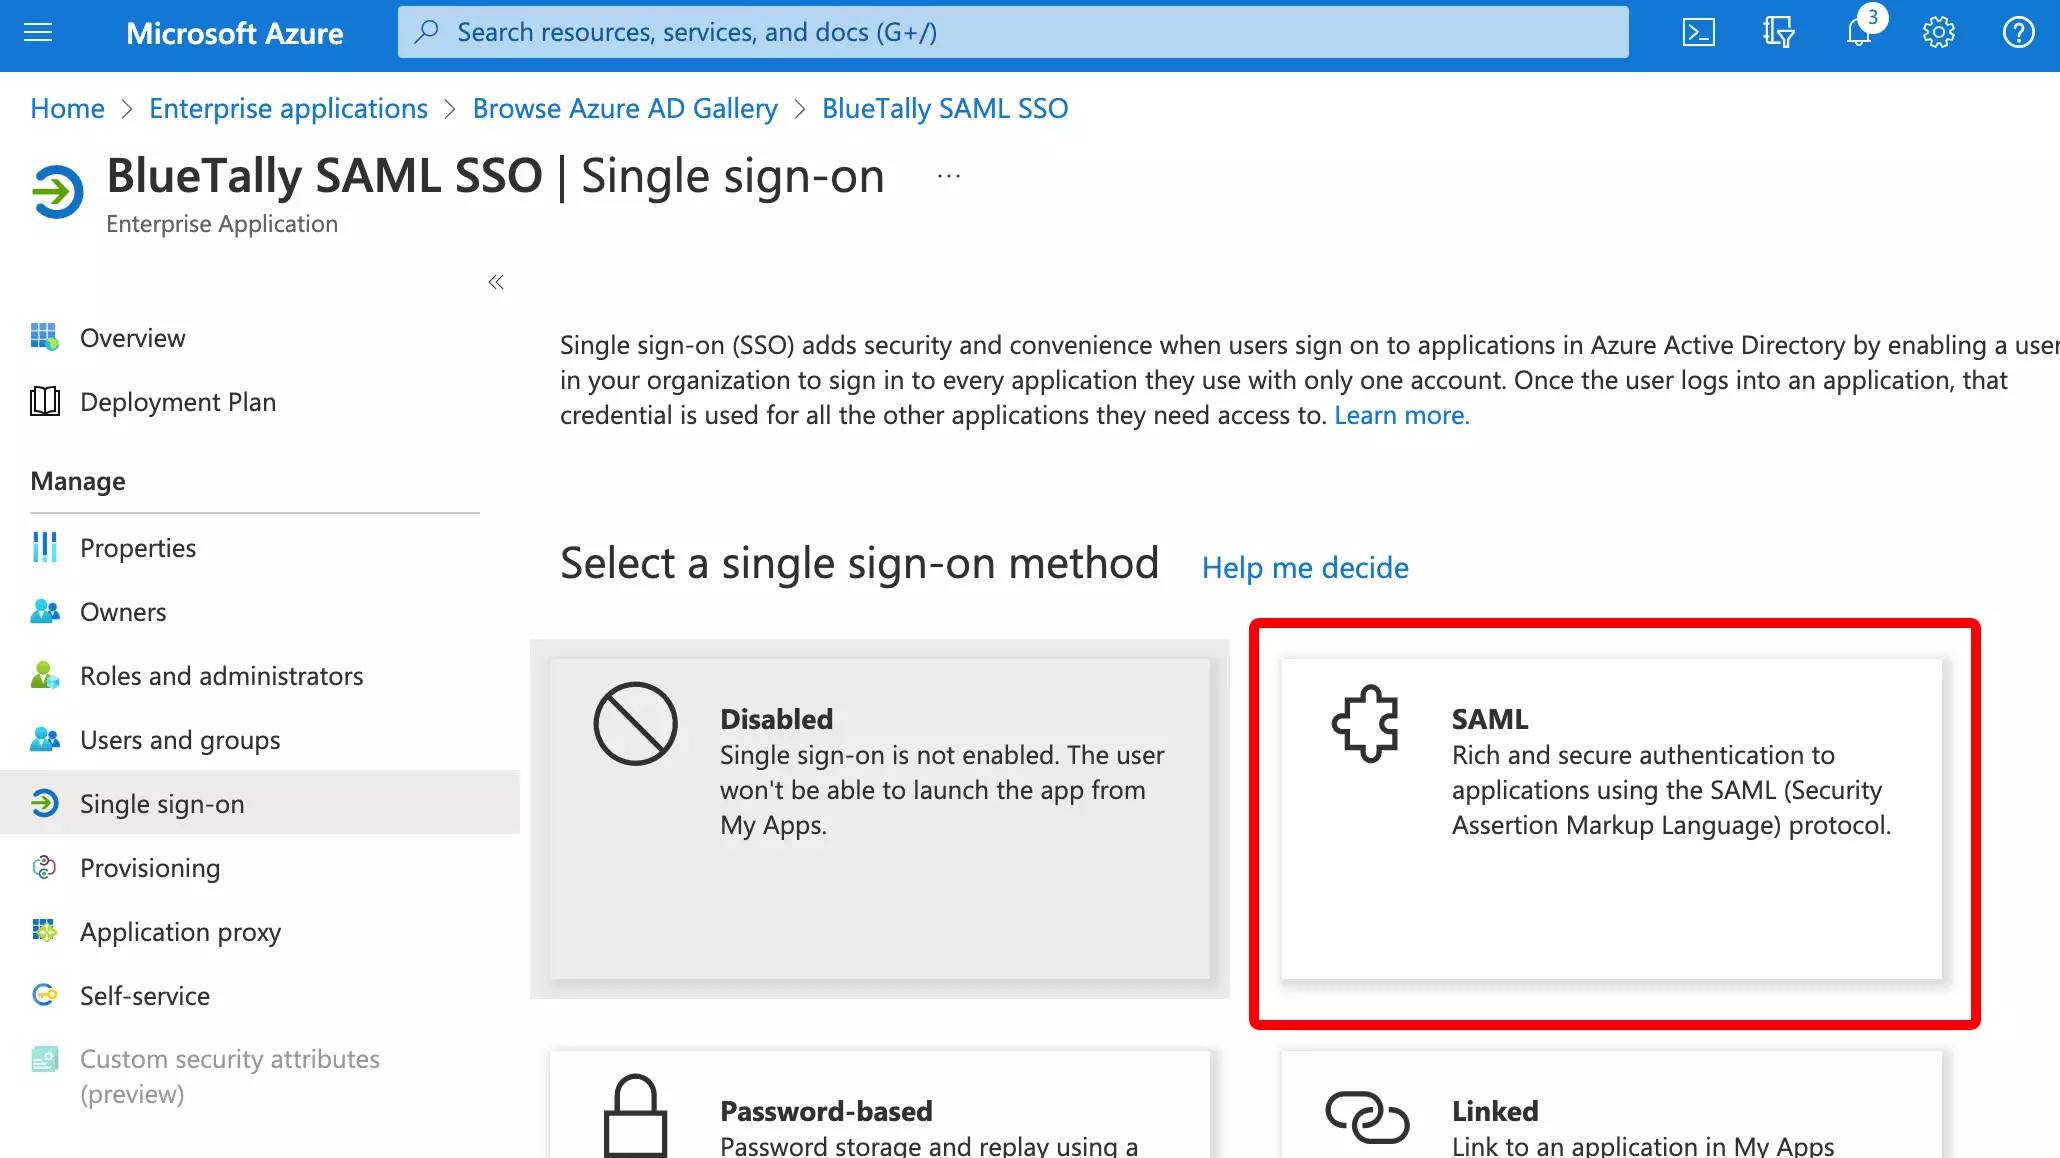
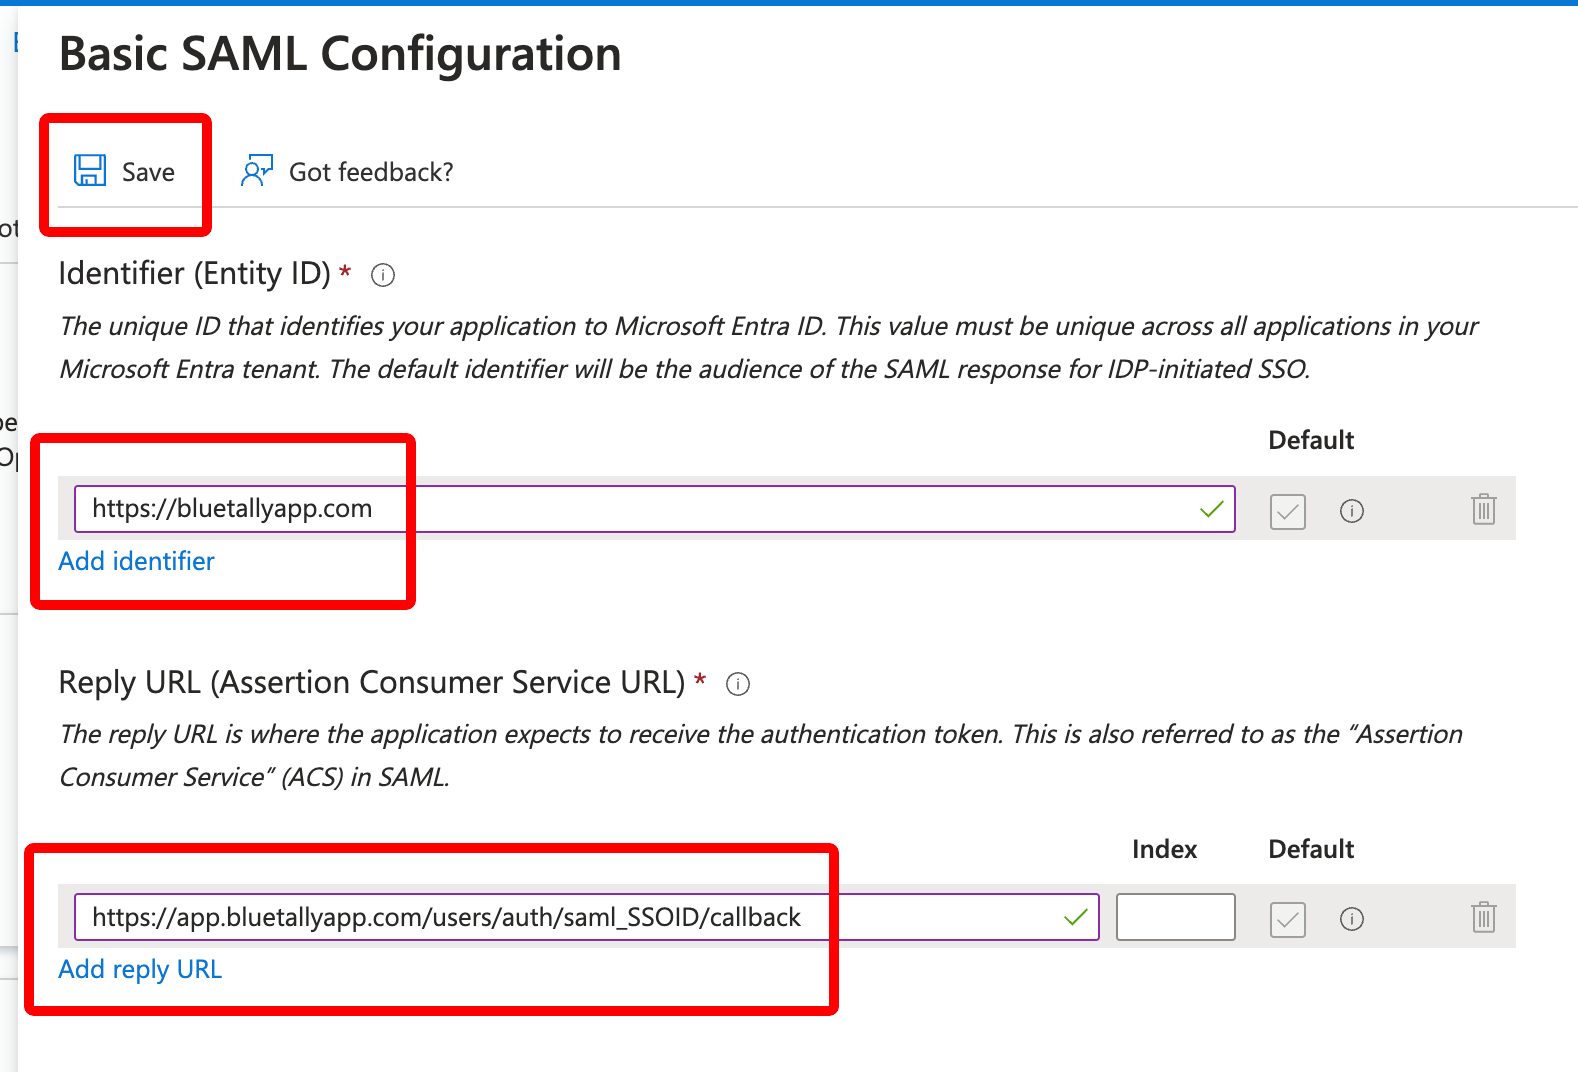
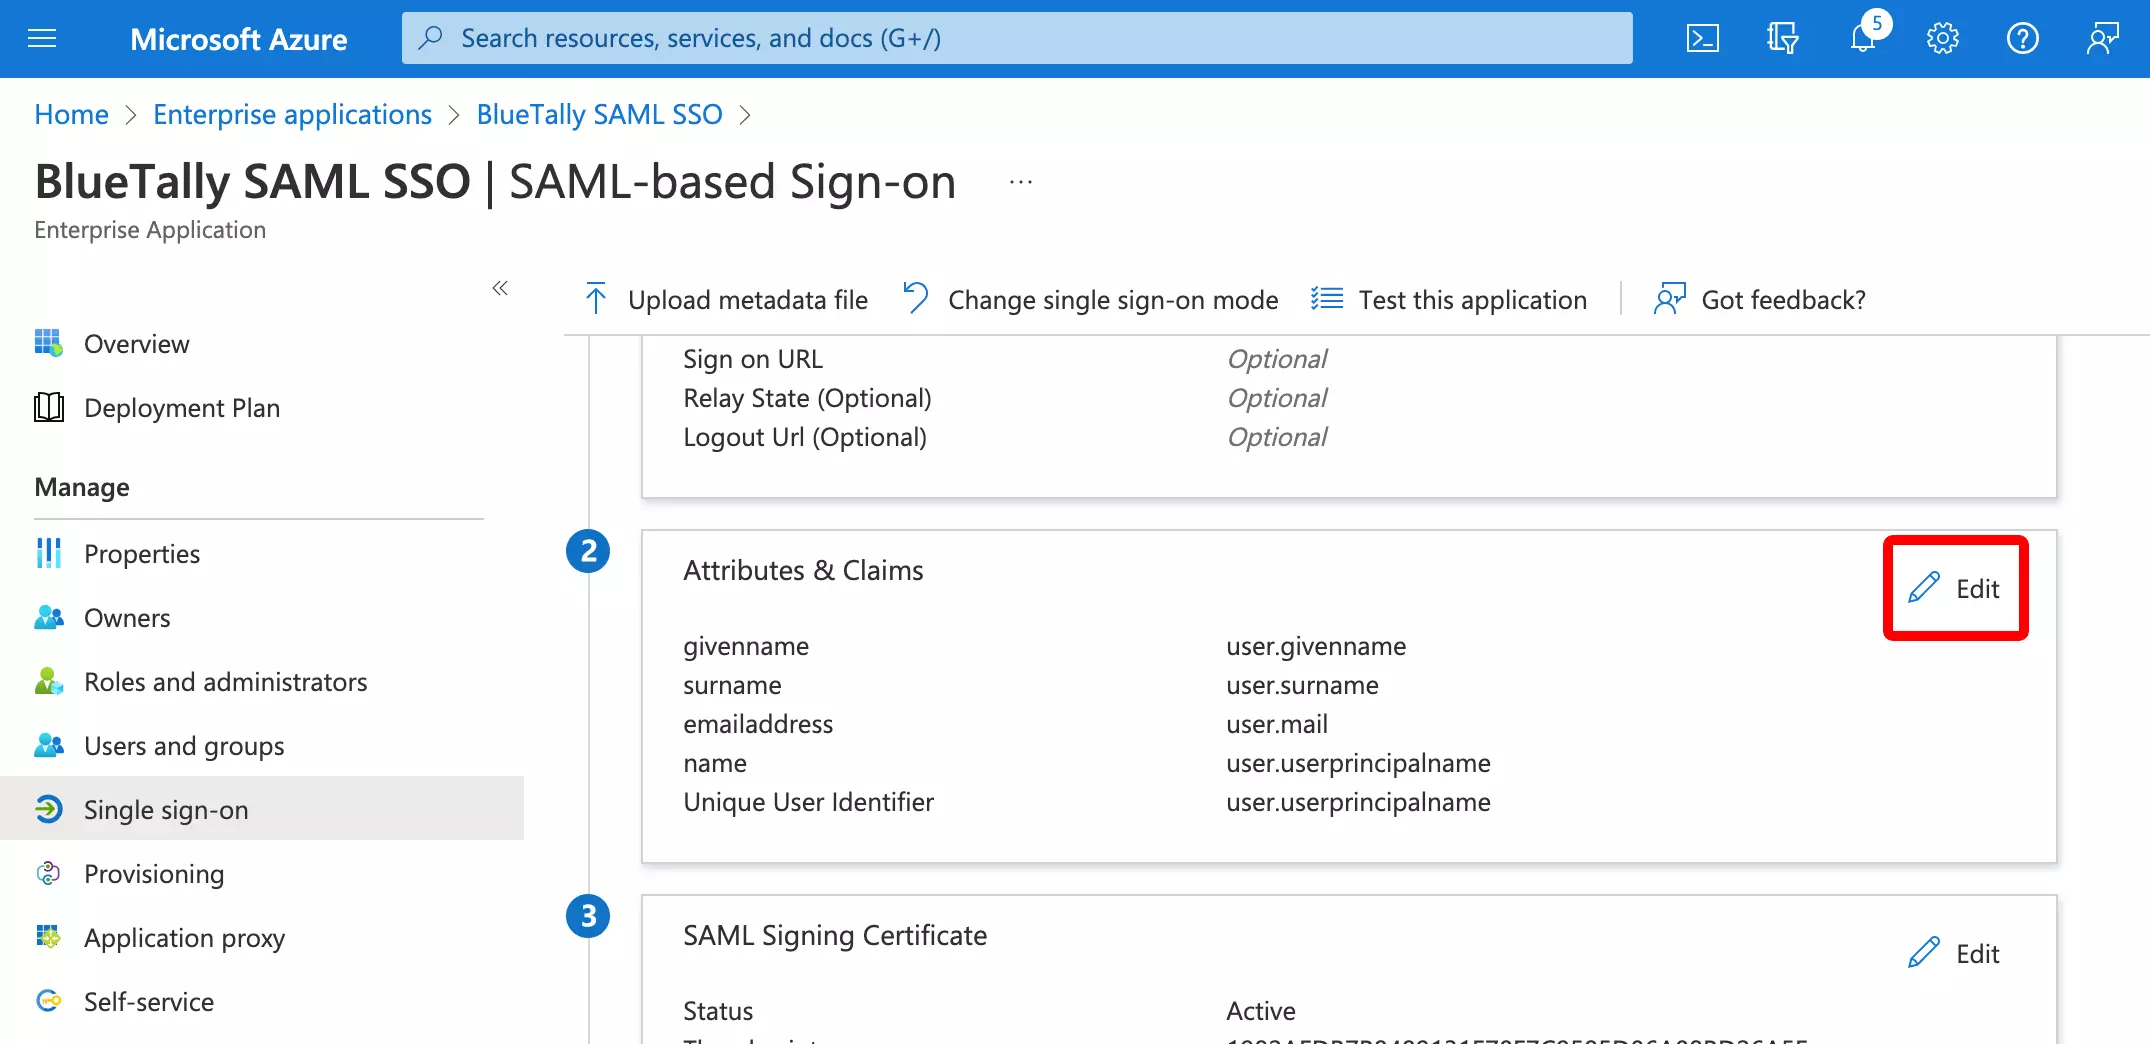
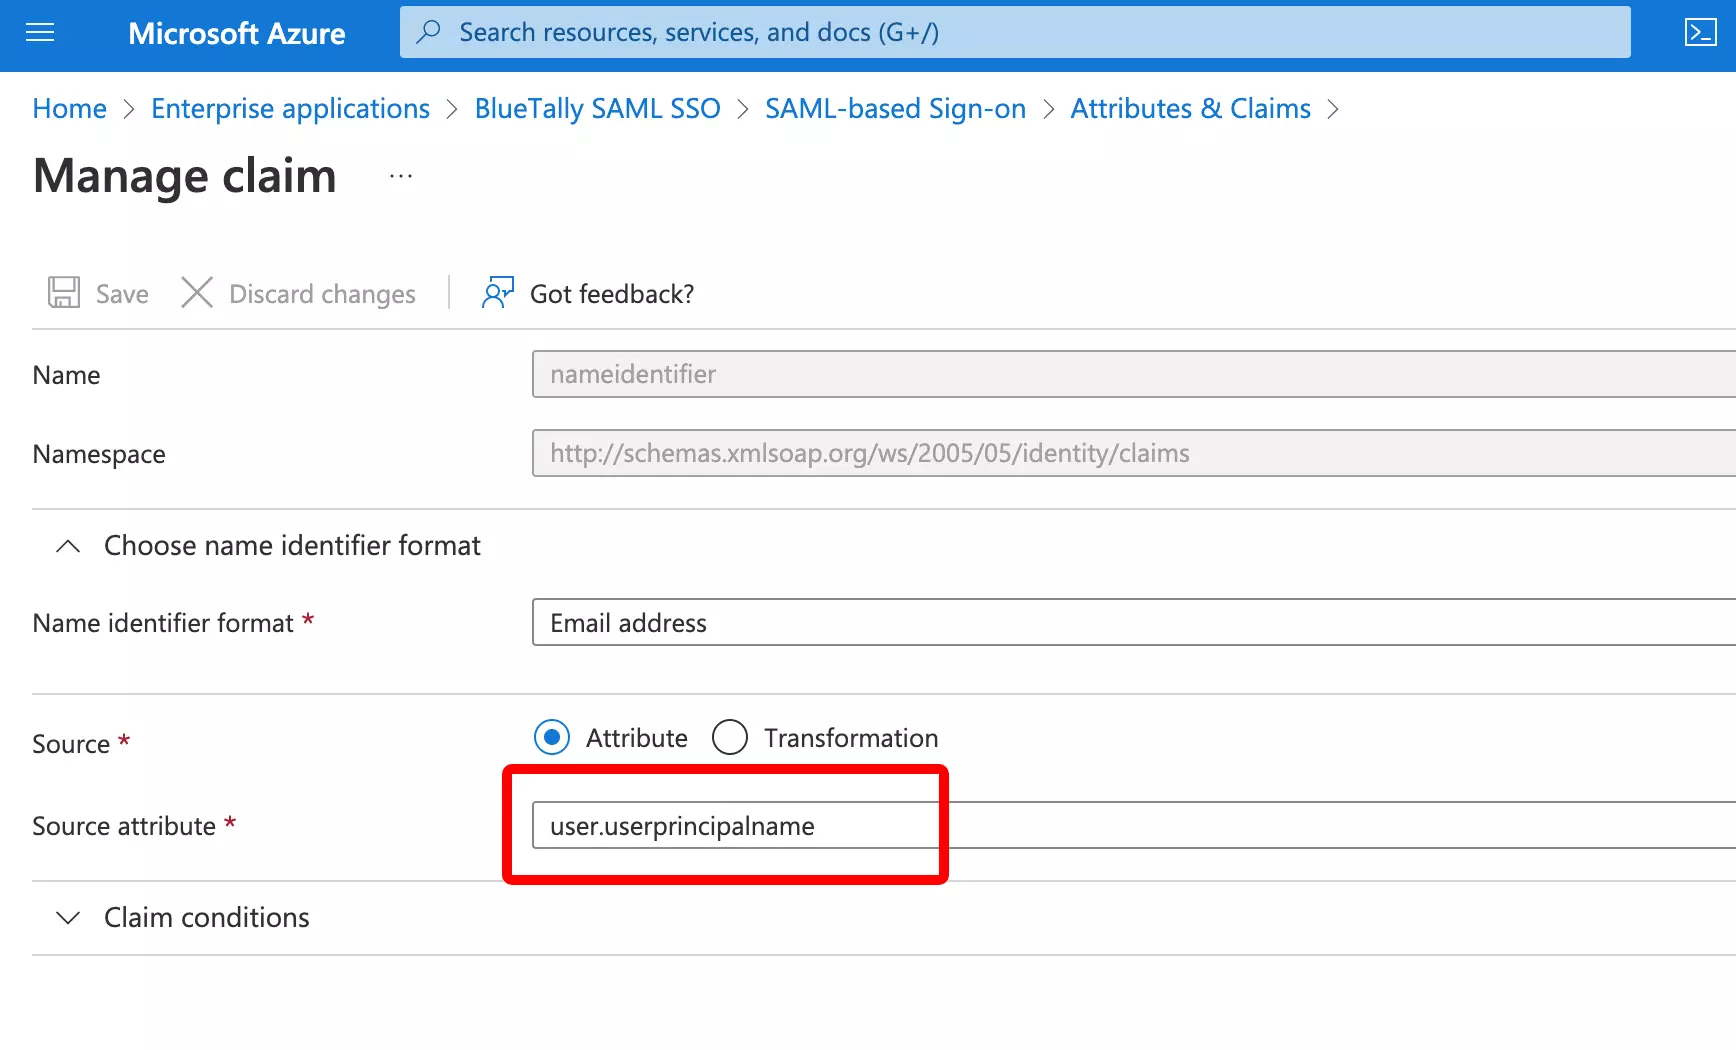
1) Log in to your Azure account and click on "Azure Active Directory"

How to setup SSO with Azure Active Directory

2) Click on "Enterprise applications" in the left menu bar

How to setup SSO with Azure Active Directory

3) Click on "New application"

How to setup SSO with Azure Active Directory

4) Click on "Create your own application"

How to setup SSO with Azure Active Directory

5) Enter a name for the application (such as 'BlueTally SAML SSO'), select the "Integrate any other..." option and click "Create"

How to setup SSO with Azure Active Directory

6) Scroll down and click on "Single sign-on" in the left menu bar

How to setup SSO with Azure Active Directory

7) Click on "SAML"

How to setup SSO with Azure Active Directory

8) Click on "Edit"

How to setup SSO with Azure Active Directory

9) Click on Add Identifier and enter "https://bluetallyapp.com", and click on Add reply URL and add "https://CUSTOMLINK.bluetallyapp.com/users/auth/saml_CUSTOMLINK/callback" (replace CUSTOMLINK with the custom link you want to use to log into the app with), then click on Save

If your custom link contains a "-", please replace it with a "_" in the last CUSTOMLINK in the Reply URL field, for example: "https://my-custom-link.bluetallyapp.com/users/auth/saml_my_custom_link/callback"

How to setup SSO with Azure Active Directory

10) Scroll down on the page and click on Edit

How to setup SSO with Azure Active Directory

11) Click on this

How to setup SSO with Azure Active Directory

12) Click on the "Source attribute" field, change the value to "user.mail" and click on Save

How to setup SSO with Azure Active Directory How to setup SSO with Azure Active Directory

13) Click on this

How to setup SSO with Azure Active Directory

14) Change the "Name" value to "first_name", remove the text from the "Namespace" field and click on Save

How to setup SSO with Azure Active Directory

15) Click on this

How to setup SSO with Azure Active Directory

16) Change the "Name" value to "last_name", remove the text from the "Namespace" field and click on Save

How to setup SSO with Azure Active Directory

17) Scroll down and download the "Certificate (Base64)" and copy the "Login URL".

How to setup SSO with Azure Active Directory

18) Go to your BlueTally account settings and enter the "CUSTOMLINK" you decided on earlier, paste in the "Login URL", upload the "Certificate (Base64)" and decide on which role you'd like new users to have by default.

How to setup SSO with Azure Active Directory

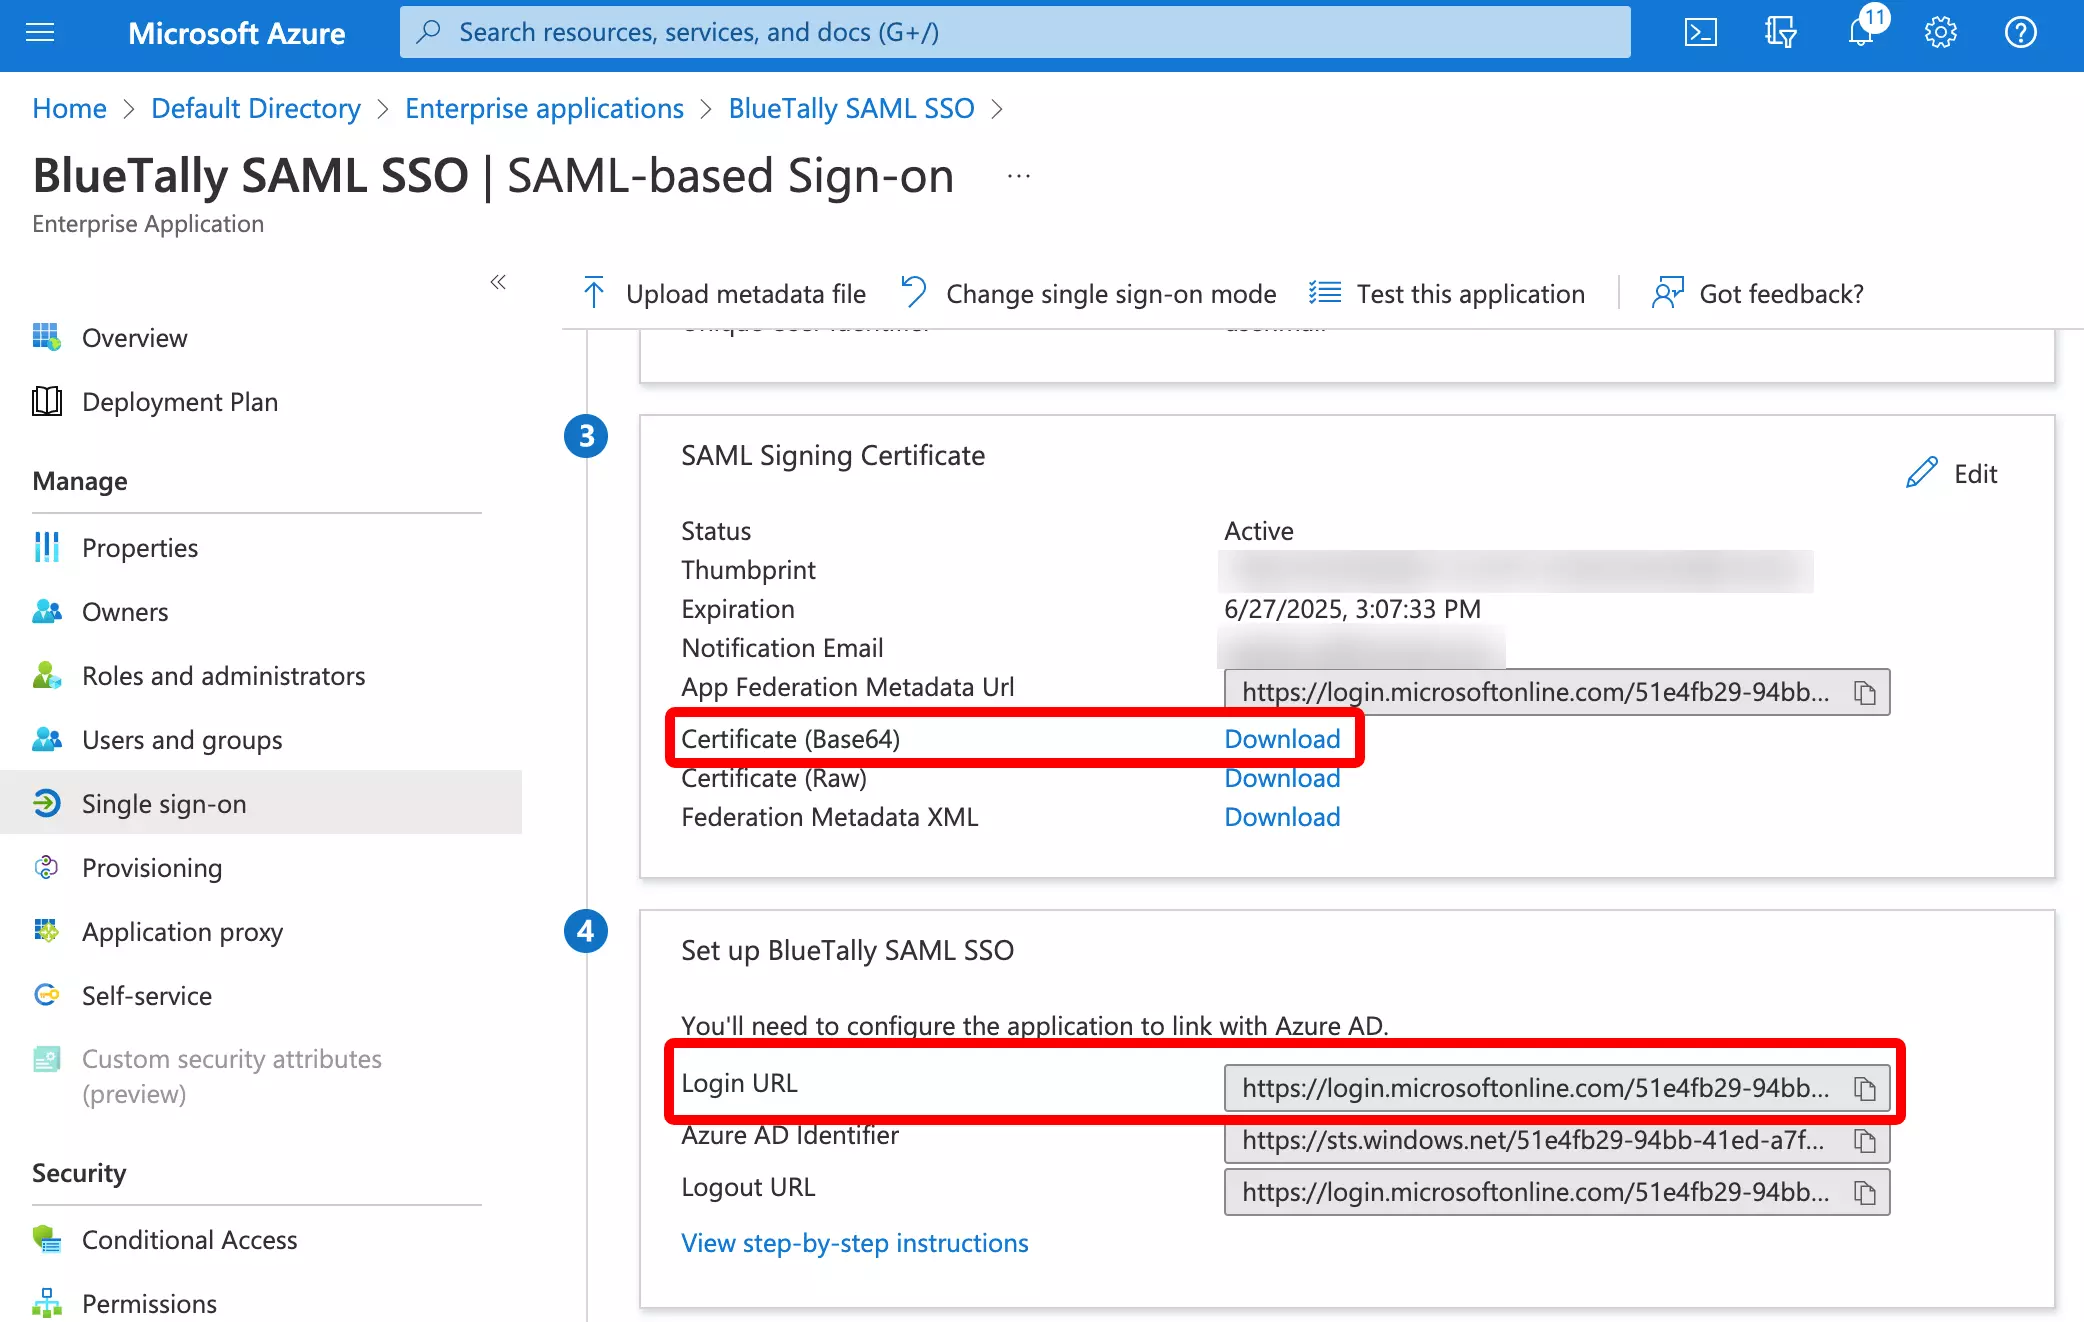
That's it! Once you upload these details into your account settings, we'll complete the setup on our end - this usually takes less than 1 hour. You'll receive an email when everything is ready.
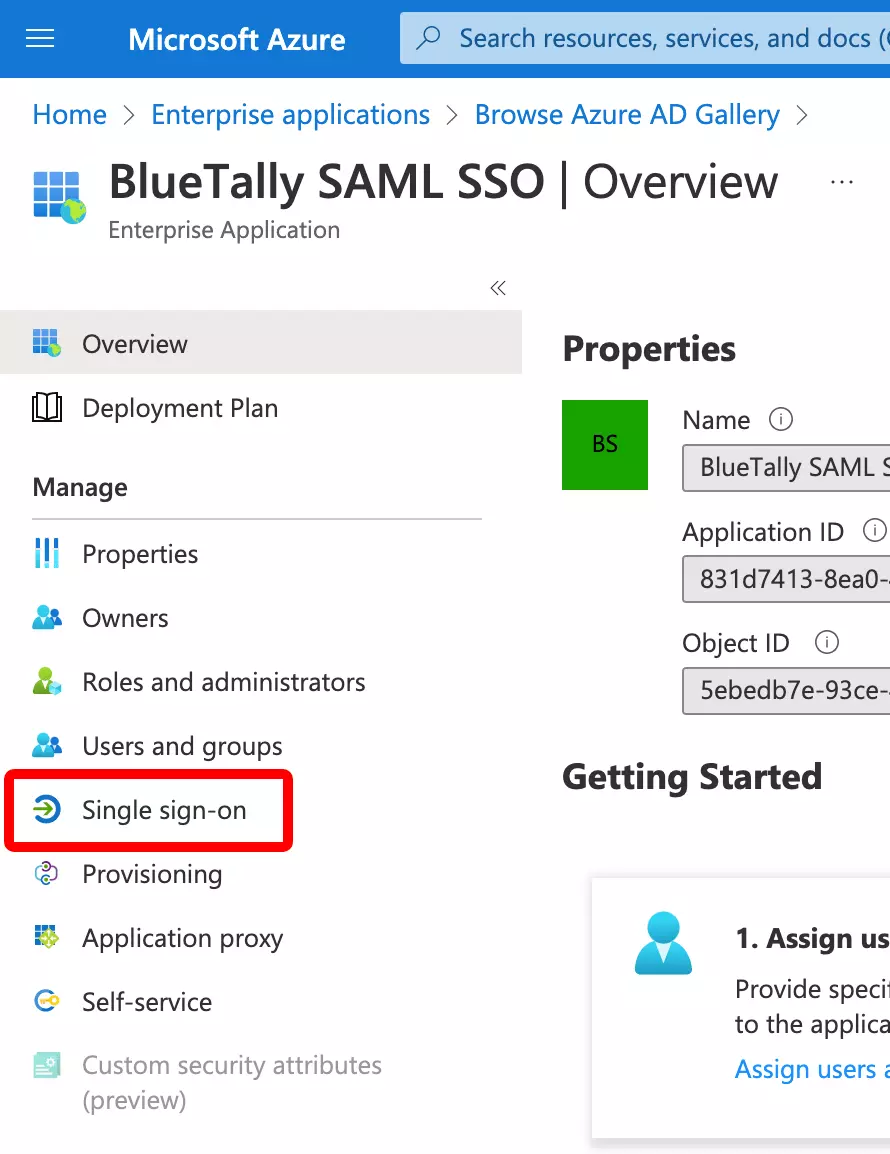
If you have any questions regarding this integration, send us an email to [email protected] and we'll assist you with your setup!

You can also receive notifications directly to Microsoft Teams and Slack, integrate BlueTally with Intune or Active Directory, or into your existing workflows by using our powerful API.


Get started for free now

Our Free Plan includes all features and up to 50 assets